
Good laundry room storage ideas start with one fact: the laundry room is the hardest-working small room in the house, and it is usually the least planned. Detergent bottles pile up on the machines, clean clothes wait for a folding surface that does not exist, and the floor collects baskets nobody can put away. The 28 ideas below give every item a home — shelves, cabinets, carts and zones — so the pile-up ends for good.
The difference between a tidy laundry room and a chaotic one comes down to three choices: use the walls, give each job its own zone, and keep daily items within arm’s reach of the washer. Shelves 12 inches deep hold detergent without crowding the machines, one basket per shelf keeps the look calm, and a cart in the gap beside the machines turns dead space into storage.
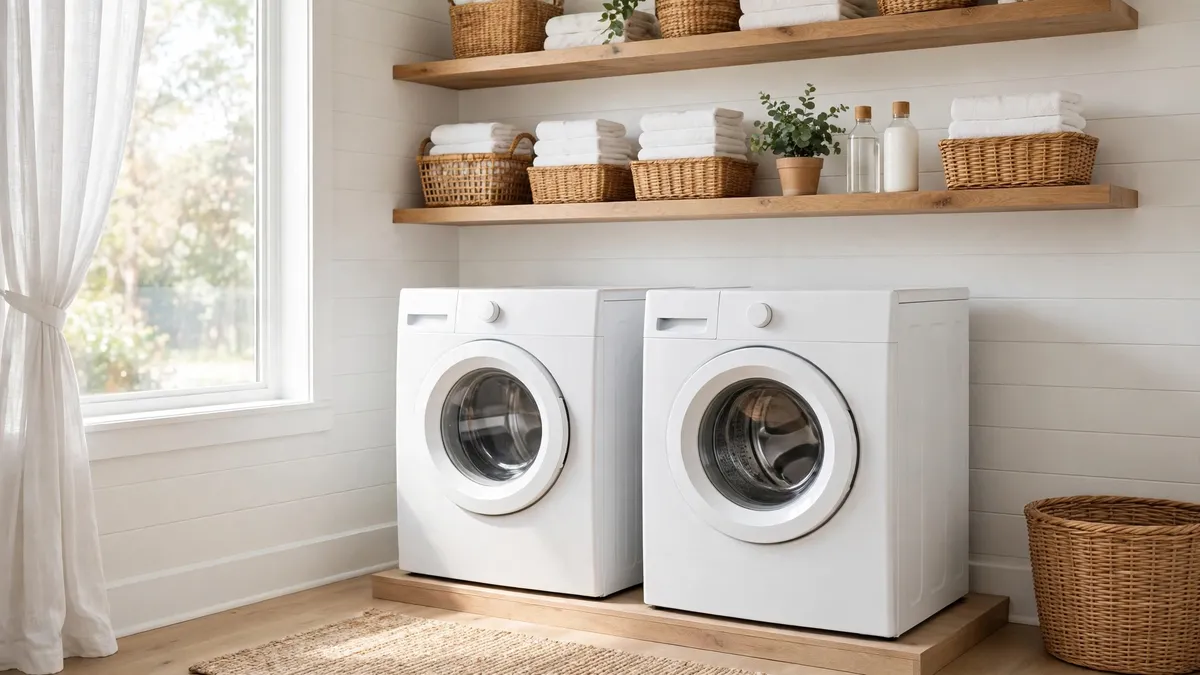
Why You’ll Love These Laundry Room Storage Ideas
A laundry room does not need a bigger footprint — it needs its walls and gaps to work harder. These ideas build storage upward and into the spaces you already have: open shelves first, then cabinets, then carts and drying storage, so each option fits a different budget, lease and room size. Most cost little, several need no tools at all, and every one of them is storage-specific — no decor for decor’s sake.
How to Choose the Right Laundry Room Storage for Your Home
Measure first: most washers and dryers are about 27 inches wide each, so a side-by-side pair takes up roughly 54 to 56 inches of wall, and the lowest shelf must clear a top-loader lid by a few inches so it opens fully. Pick your mounting — freestanding and over-door if you rent, screwed-in shelves and cabinets if you own — and one material that matches the room. If you are planning the whole room, not just the storage, our laundry room ideas will help you think through layout, colour and lighting too.
Shelves Above the Machines
1. One Long Shelf Over the Machines
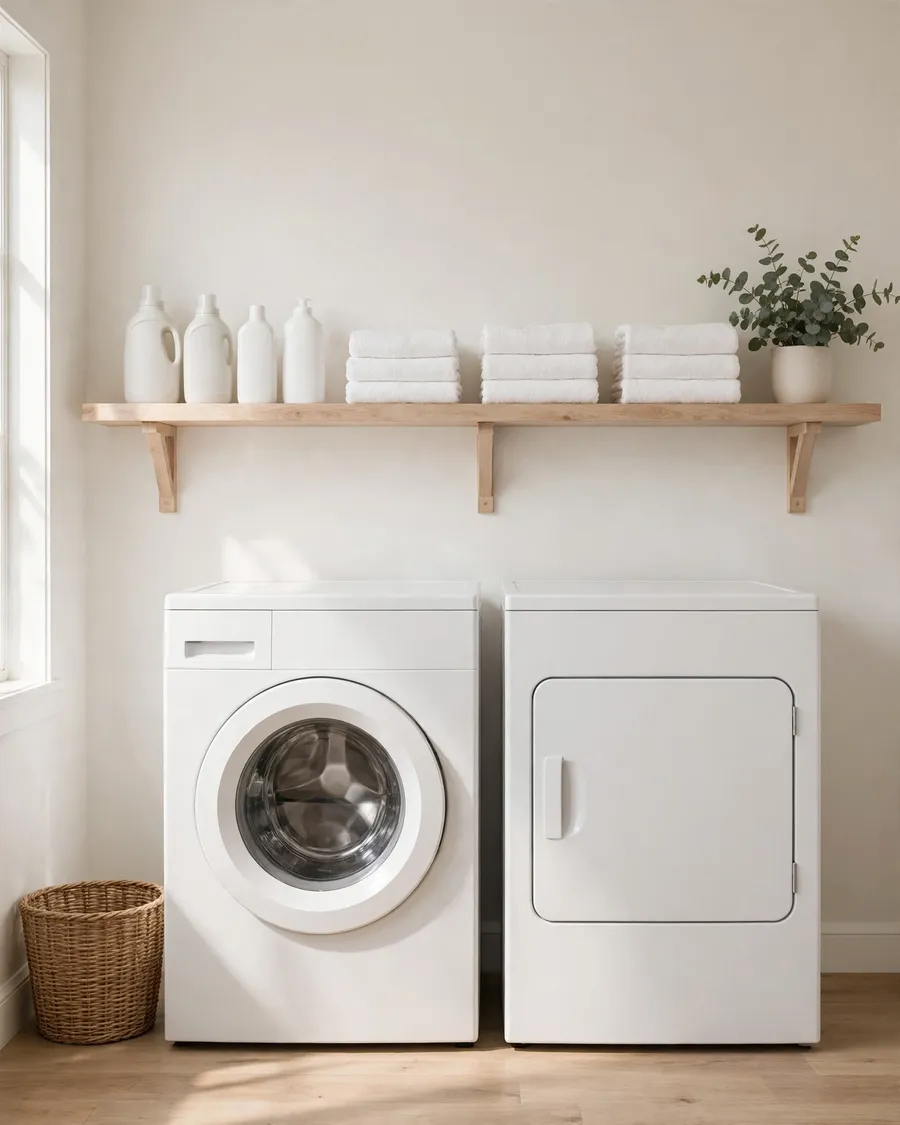
A single long shelf spanning the full width of the washer and dryer is the fastest storage win in a laundry room. One board, two brackets, and suddenly every bottle has a home off the machines. Best for: first laundry rooms and tight budgets. Styling tip: keep the shelf 12 inches deep so bottles sit safely without crowding the machines. Pro tip: mount it 18 to 20 inches above the machines so you can still lift a top-loader lid fully.
2. Two Floating Shelves With Baskets
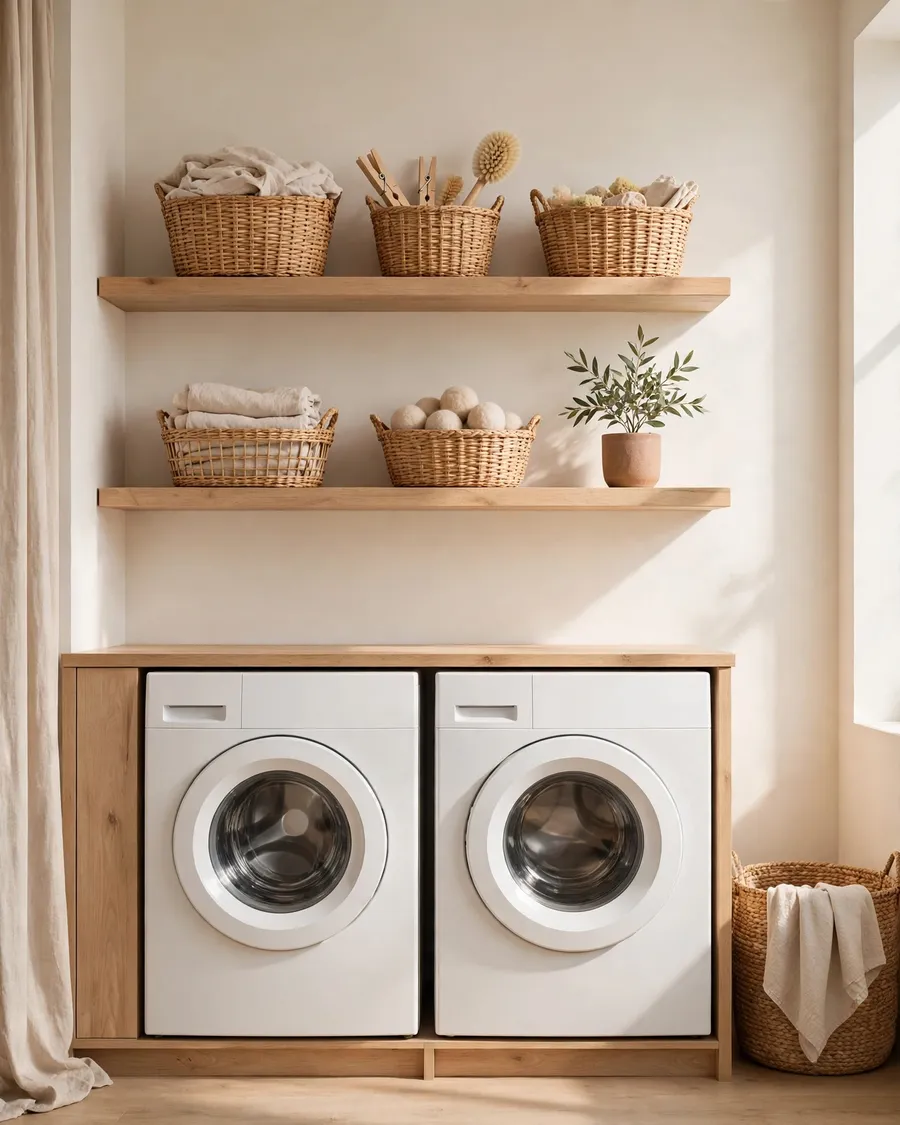
Two floating wood shelves above the machines add warmth and storage without the bulk of a cabinet, and baskets on them hide the less pretty supplies. Best for: owned homes and warm, natural laundry rooms. Styling tip: put daily detergent on the lower shelf and spare stock up top. Pro tip: space the shelves 14 to 16 inches apart so taller detergent bottles fit without tipping.
3. A Shelf and Hanging Rod Combo
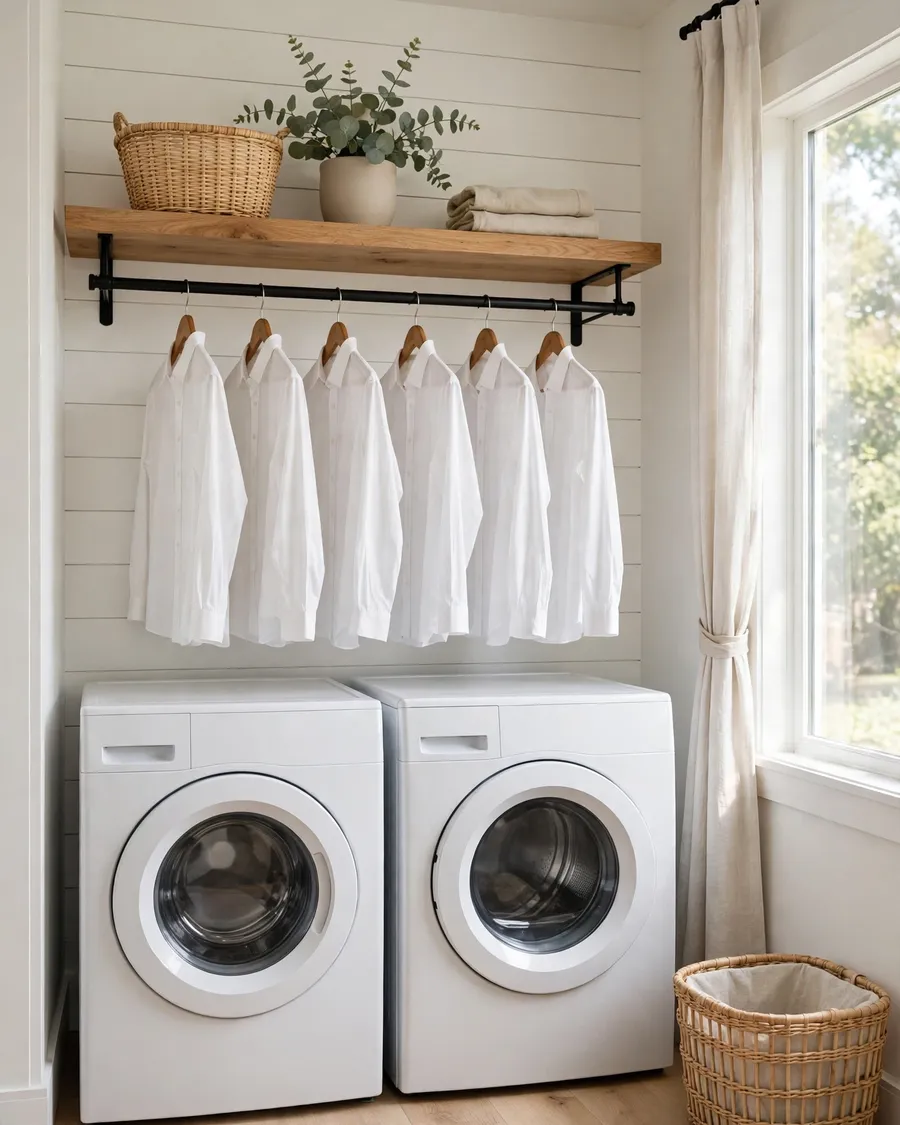
A shelf with a clothing rod mounted underneath solves two problems at once: storage above, and a place to hang shirts straight out of the dryer below. Best for: households that air-dry or hate ironing. Styling tip: leave half the rod empty so clothes dry without creasing. Pro tip: mount the rod 6 to 8 inches below the shelf so hangers swing freely without hitting the shelf edge.
4. Open Shelving With Labelled Baskets

Open shelves work best when every basket has a label and a job — detergent in one, dryer sheets in another, stain sticks in a third — so nobody has to dig. Best for: busy family laundry rooms. Styling tip: use matching baskets in one material so open shelves read calm, not cluttered. Pro tip: baskets about 10 to 11 inches wide fit most standard shelves; measure before buying a set.
5. A High Shelf Near the Ceiling for Bulk Stock
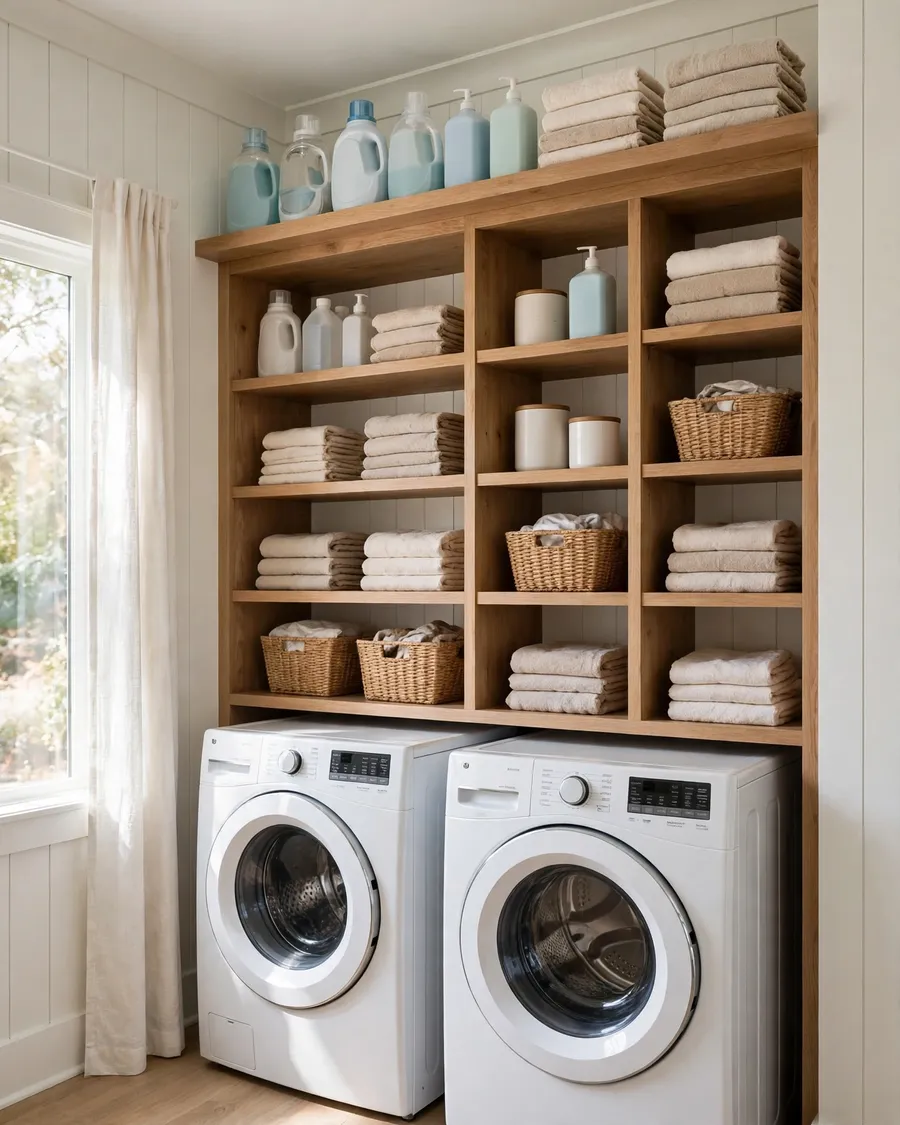
The strip of wall between your top shelf and the ceiling is dead space in most laundry rooms, and it is perfect for bulk stock you only reach for once a month. Best for: bulk buyers and small rooms with no pantry. Styling tip: keep a small folding step stool in the room so the high shelf stays usable. Pro tip: store heavy bulk bottles low on that shelf, never at the very top edge, so nothing falls on your head.
6. Corner Shelves for a Dead Corner

When the laundry room has a corner that holds nothing but a mop, two small corner shelves turn it into storage for jars, cloths and stain removers. Best for: awkward layouts and tiny laundry closets. Styling tip: keep corner shelves to two tiers so they never loom over the machines. Pro tip: triangular shelves hold less than they look — reserve them for jars and small bottles, not folded towels.
7. A Narrow Ledge Shelf for Detergent Bottles

A narrow ledge shelf, just 4 to 5 inches deep, holds detergent bottles, stain spray and fabric softener right where you pour — no deep shelf needed. Best for: laundry closets with almost no wall depth. Styling tip: line the bottles up tallest at the back so labels stay readable. Pro tip: add a small lip or rail along the front edge so bottles never vibrate off when the washer spins.
Cabinets and Closed Storage
Open shelves show everything, which is lovely until the room holds cleaning chemicals, medicines and family clutter. When the laundry room doubles as a utility room, closed storage wins — and the layout still matters, so our small laundry room ideas will help you place cabinets where they work hardest in a tight space.
8. Upper Cabinets With Doors Above the Machines

Upper cabinets with doors hide detergent, bleach and cleaning supplies behind closed fronts, which is the fastest route to a calm-looking laundry room. Best for: shared family laundry rooms and homes with small children. Styling tip: paint cabinets the same colour as the walls so a small room looks less busy. Pro tip: cabinets 12 inches deep fit over most machines; deeper cabinets block the top-loader lid.
9. A Tall Pantry Cabinet for Brooms and Bulk

A tall pantry-style cabinet, floor to ceiling and about 18 inches wide, swallows brooms, mops, the vacuum and bulk detergent in one sweep. Best for: laundry rooms that double as cleaning cupboards. Styling tip: add hooks inside the door for the dustpan and spray bottles. Pro tip: leave a 2-inch gap at the bottom of the cabinet doors so the broom handles slide in without catching.
10. A Cabinet With Pull-Out Shelves
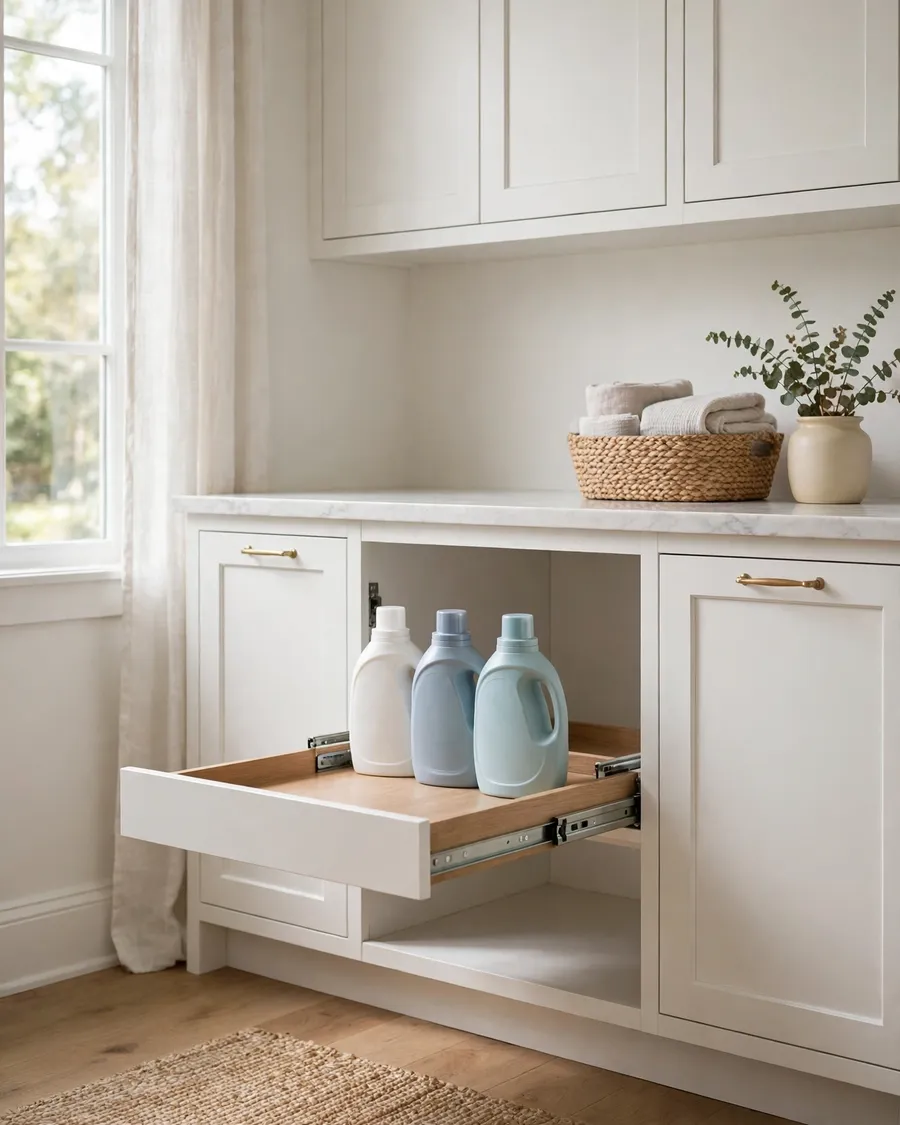
Pull-out shelves inside a base cabinet mean nothing gets lost at the back — the whole shelf slides toward you, bottles and all. Best for: deep cabinets and anyone tired of reaching past the front row. Styling tip: keep the heaviest bottles on the lowest pull-out so the slides last longer. Pro tip: full-extension slides cost a little more but are worth it; half-extension slides leave the back third unreachable.
11. A Folding Counter With Storage Cubbies Below

A countertop fitted over front-loading machines gives you a folding surface, and open cubbies below it hold folded towels and baskets ready to carry away. Best for: front-loader homes with no separate folding table. Styling tip: one cubby per family member turns folding into sorting in the same move. Pro tip: leave a 1-inch gap between the counter and the machines so vibration never rattles the countertop.
12. A Built-In Linen Cabinet for Towels
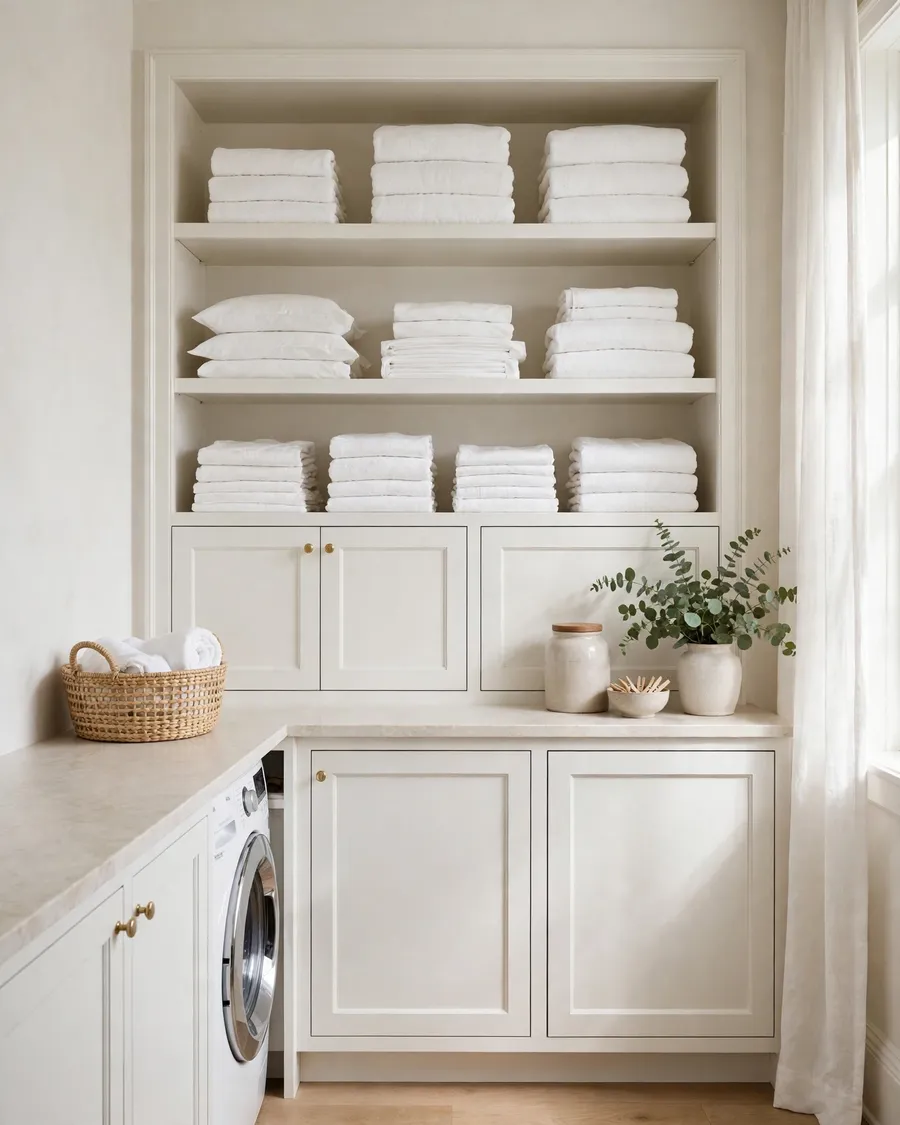
A built-in linen cabinet with adjustable shelves keeps every towel, sheet and washcloth in one place — and stops clean linen living in baskets on the floor. Best for: homes where the laundry room is also the linen cupboard. Styling tip: fold towels in thirds so the stacks read neat from across the room. Pro tip: adjustable shelves matter here: towel stacks need 12 inches, folded sheets need 14, and fixed shelves waste one of them.
13. A Cabinet Over the Door for Seasonal Supplies
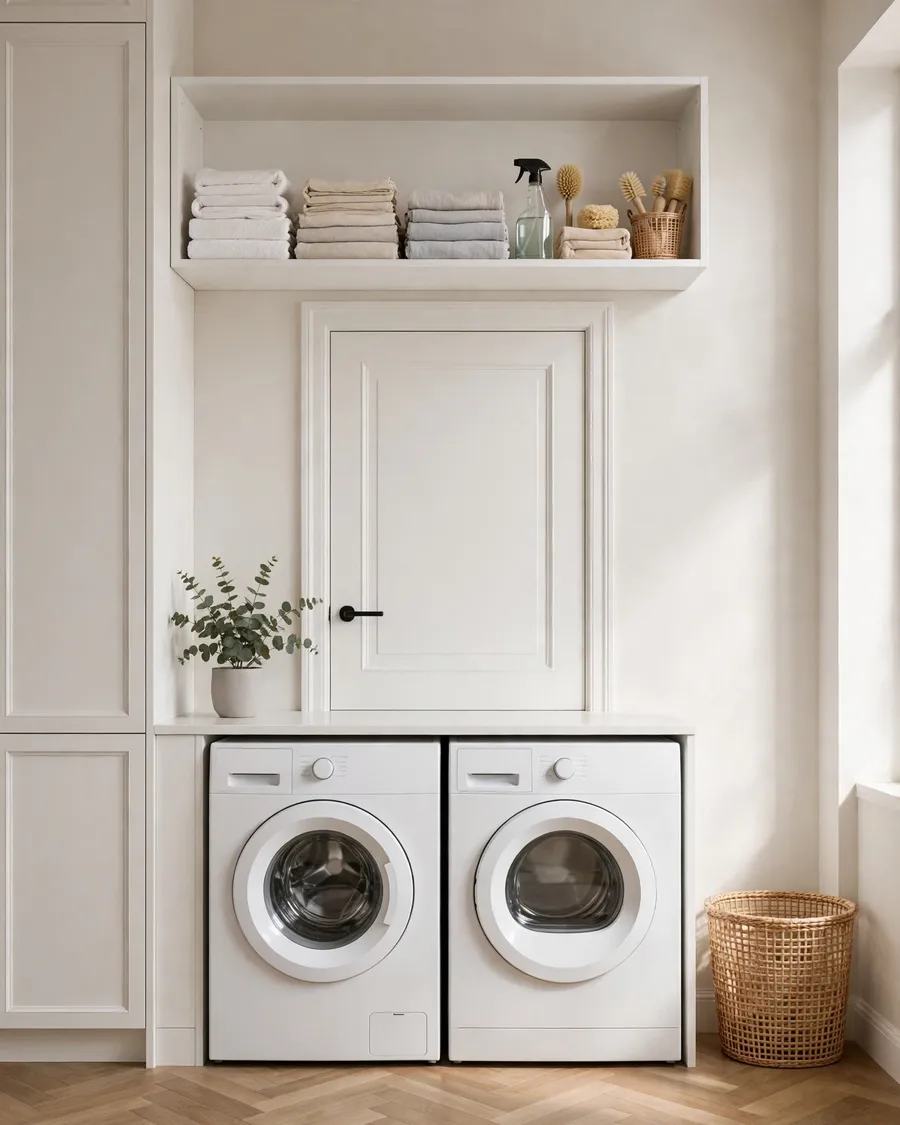
The wall above the laundry room door is storage almost nobody uses, and a shallow cabinet there holds seasonal supplies you only need twice a year. Best for: small rooms where every other wall is already taken. Styling tip: label the cabinet front discreetly so guests never open it by mistake. Pro tip: keep this cabinet shallow — 10 to 12 inches deep — so the door still swings fully open underneath it.
Carts, Rods and Drying Storage
14. A Slim Rolling Cart Beside the Machines
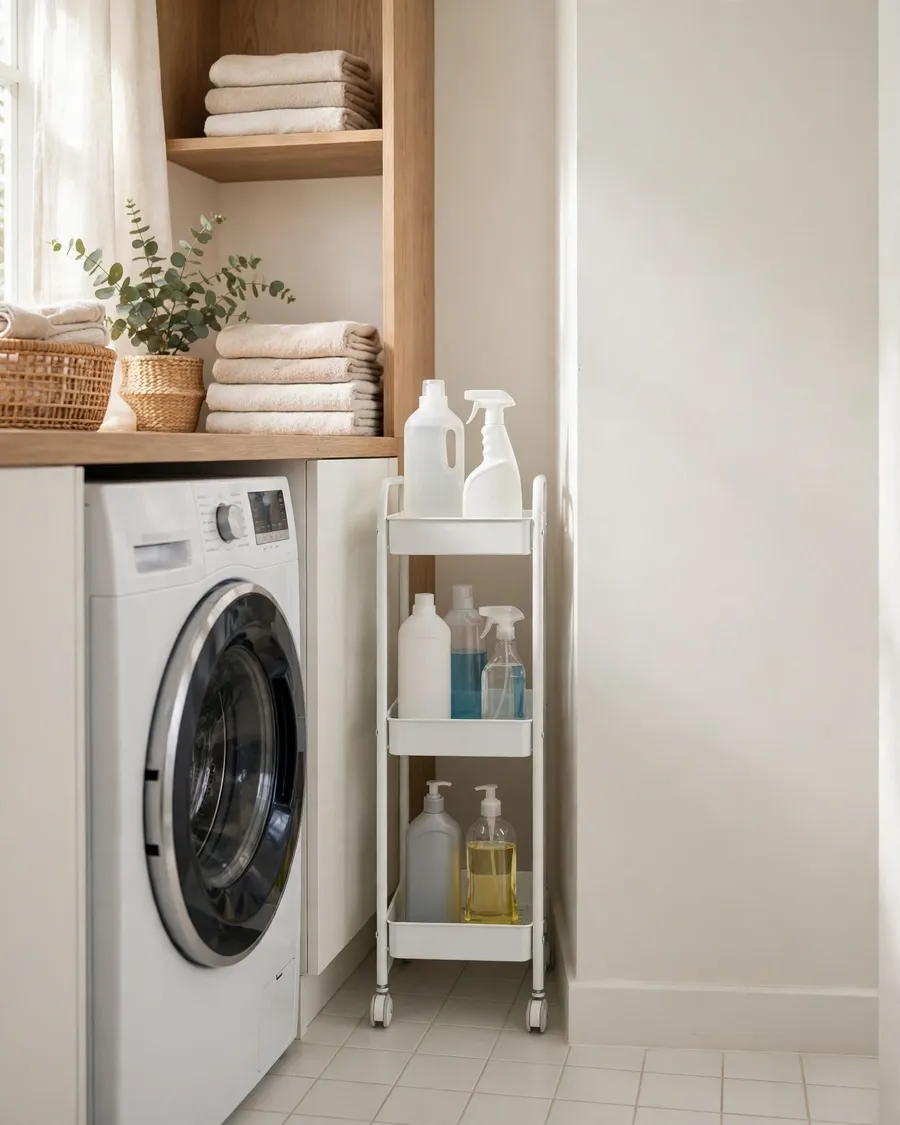
A three-tier cart about 5 to 7 inches wide slides into the gap beside the washer and rolls out when you need something from the back. Best for: laundry rooms with a gap between machine and wall. Styling tip: label the tiers — detergent, stain remover, dryer sheets — so nothing gets lost. Pro tip: measure the gap first; carts come in fixed widths and a centimetre matters.
15. A Rolling Laundry Sorter With Three Compartments
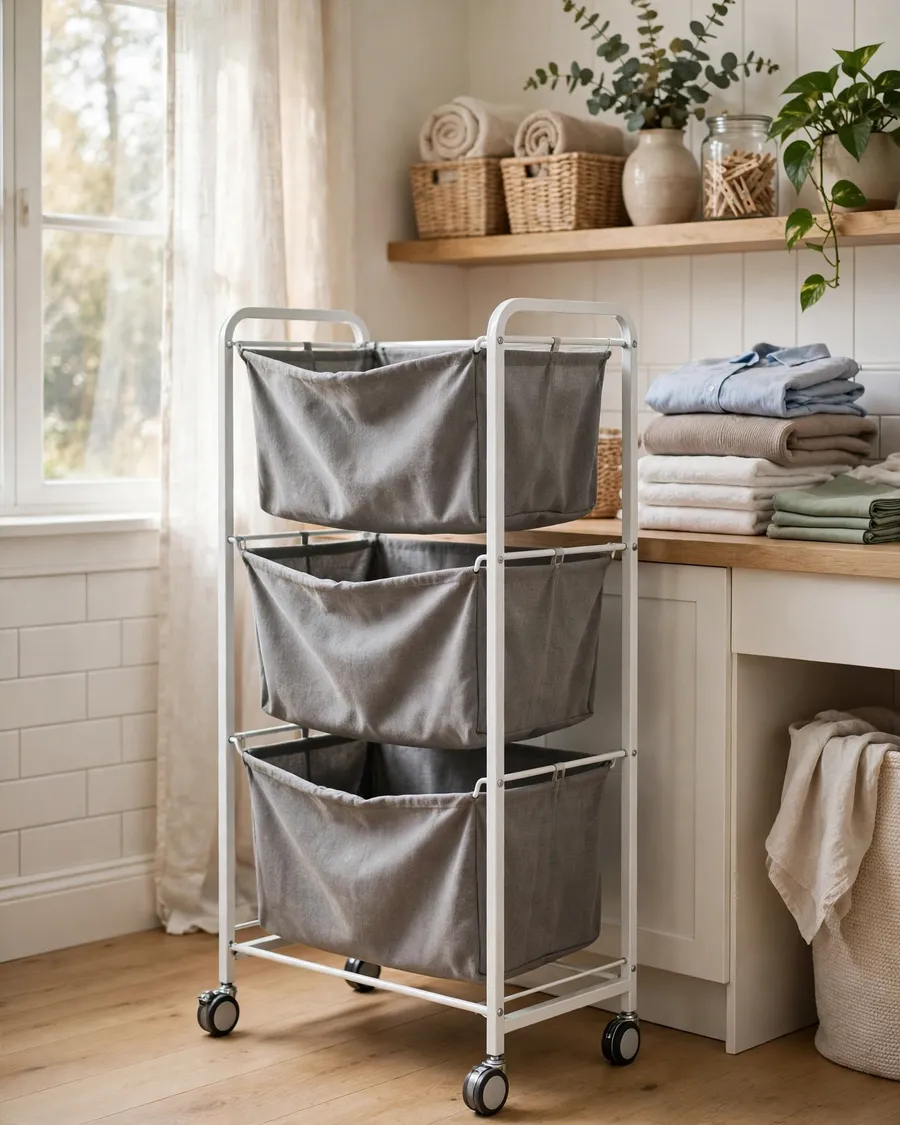
A rolling sorter with three compartments — whites, colours, delicates — means sorting happens the moment clothes hit the basket, not on laundry day. Best for: families who wash several loads a week. Styling tip: use removable liner bags so a full compartment lifts straight to the washer. Pro tip: mesh bags breathe better than solid canvas, so damp clothes never smell while they wait.
16. A Pull-Out Drying Rack That Folds Flat
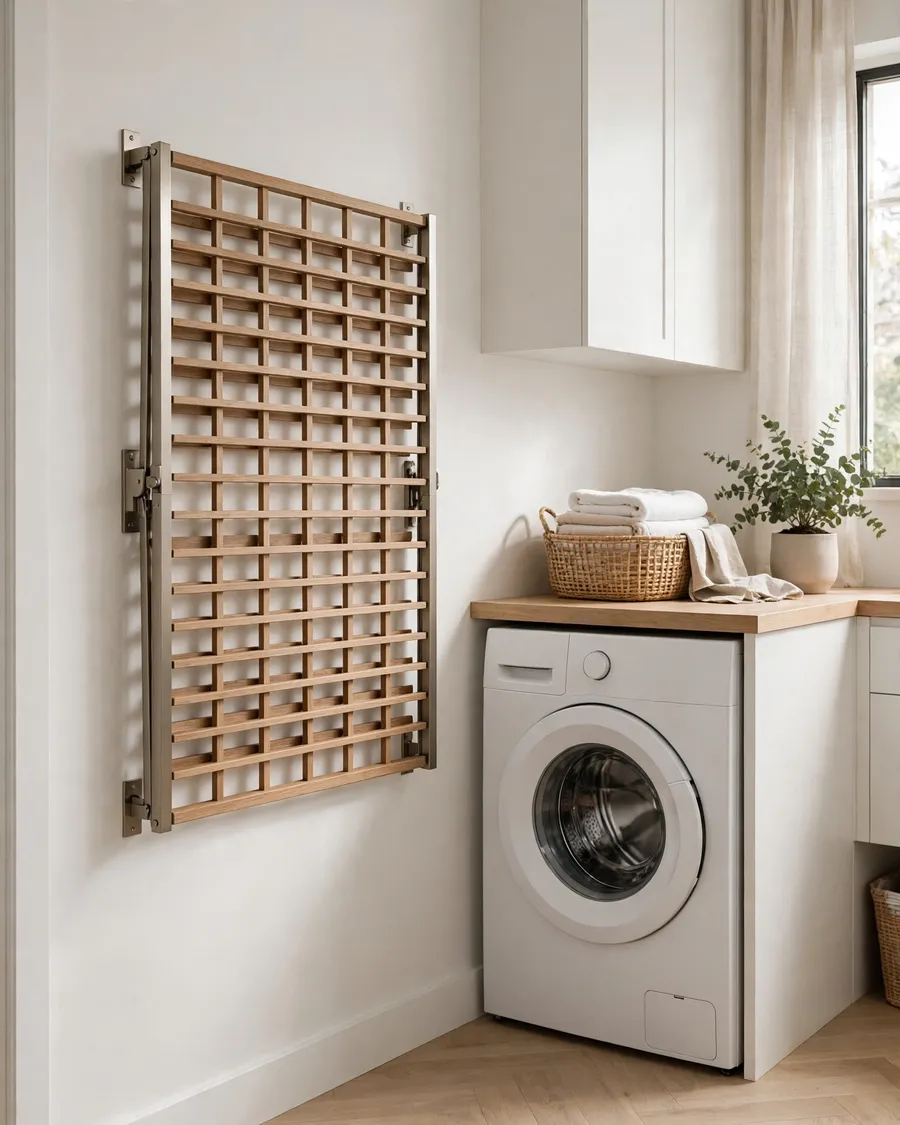
A wall-mounted drying rack that pulls out for wet clothes and folds flat against the wall when empty gives you drying space without losing floor space. Best for: small laundry rooms and delicates. Styling tip: mount it near a window or vent so clothes dry faster. Pro tip: check the weight rating before loading it — most fold-flat racks hold 10 to 15 pounds, not a full wet load.
17. A Wall-Mounted Drying Rack Above the Sink
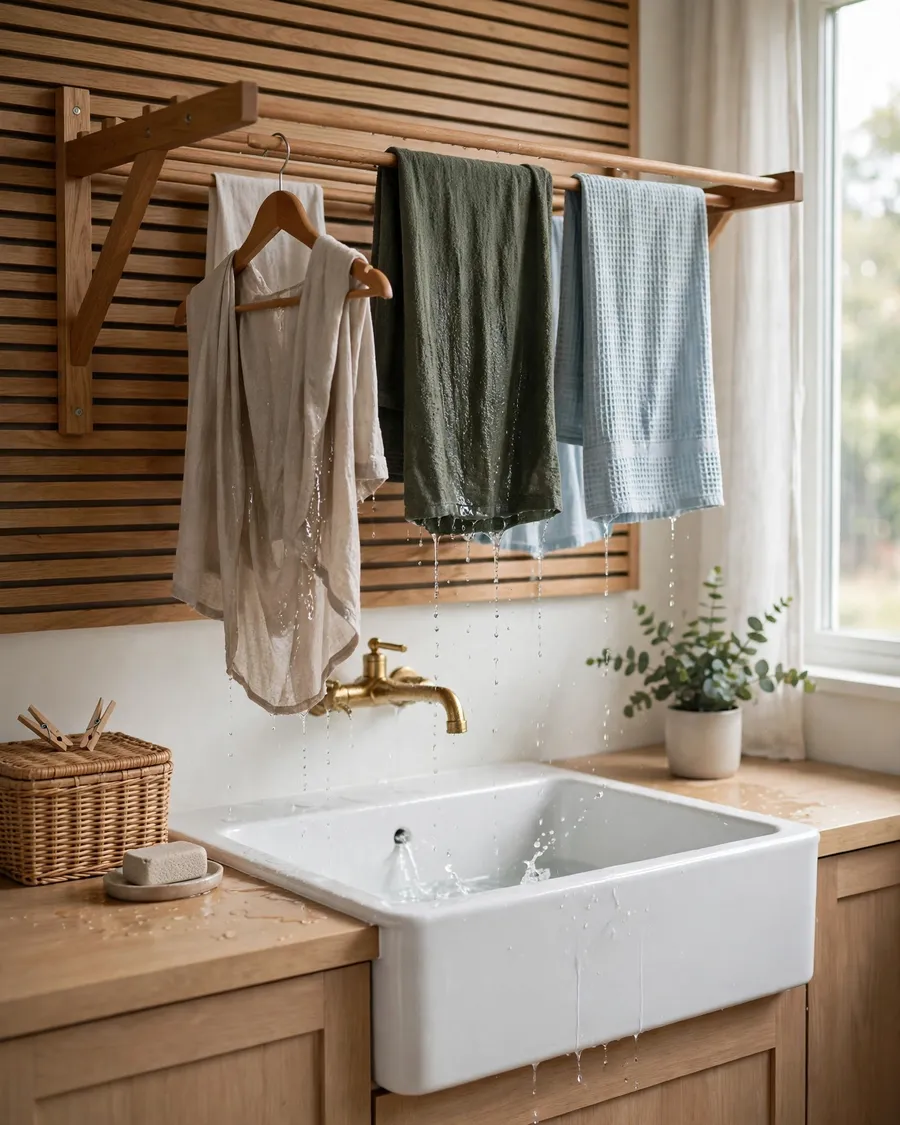
A drying rack mounted above the laundry sink lets drips fall straight into the basin instead of onto the floor, which keeps the room dry and safe. Best for: hand-wash items and homes with a laundry sink. Styling tip: keep the rack the same width as the sink so nothing drips past the edges. Pro tip: wooden dowel racks dry faster than solid shelves because air moves around every garment.
18. A Hanging Rod Under the Shelf for Air-Drying
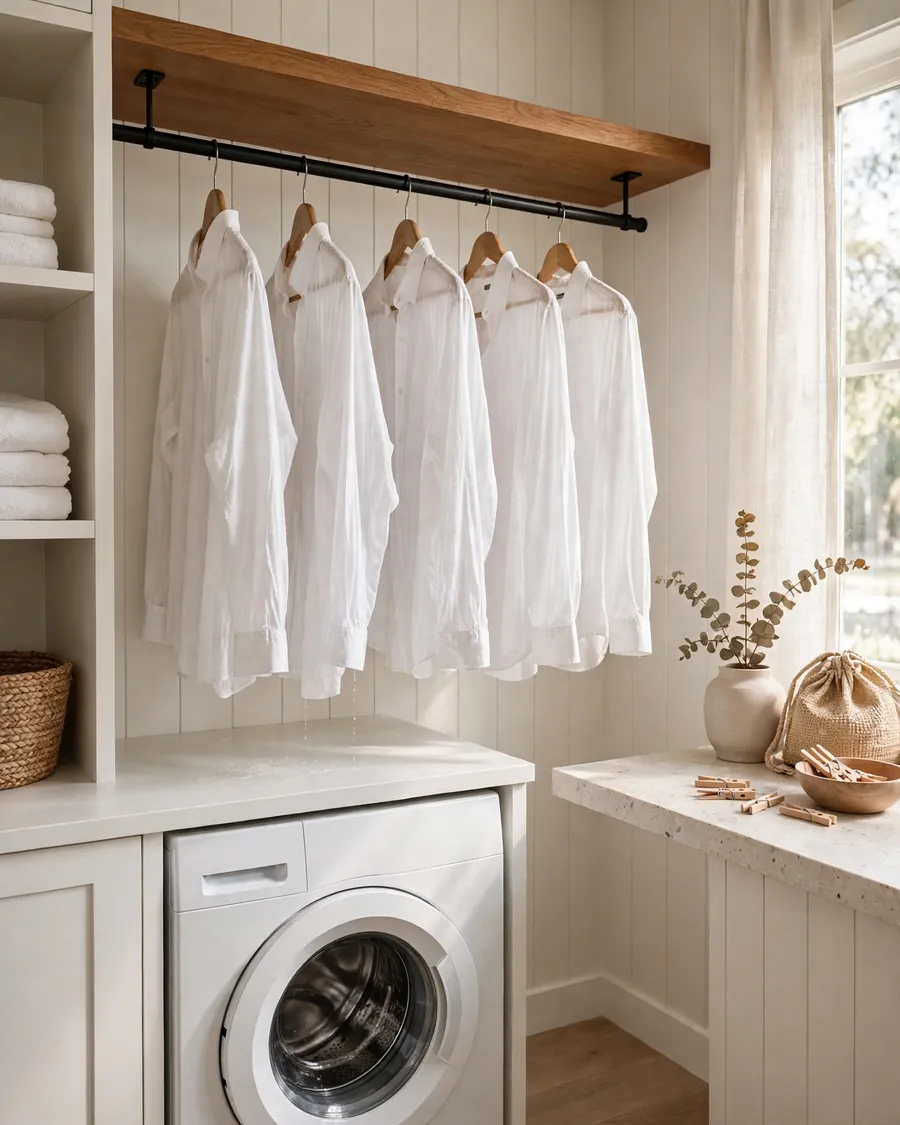
A simple rod fixed under a shelf or between two cabinets creates dedicated air-drying space that costs almost nothing and uses no floor at all. Best for: renters and anyone who air-dries daily. Styling tip: use matching slim hangers so the rod reads tidy even when full. Pro tip: a tension rod works between two walls with no drilling, but it holds far less weight than a screwed-in rod — keep it to light shirts.
19. A Fold-Down Ironing Board in a Cabinet

A fold-down ironing board built into a wall cabinet hides the board completely when closed and opens in seconds when a shirt needs pressing. Best for: small laundry rooms where a freestanding board never has a home. Styling tip: keep the iron on the shelf inside the same cabinet so everything is in one place. Pro tip: mount the cabinet at hip height — a board that folds down too high or too low strains your back within minutes.
20. A Pull-Out Ironing Board Drawer
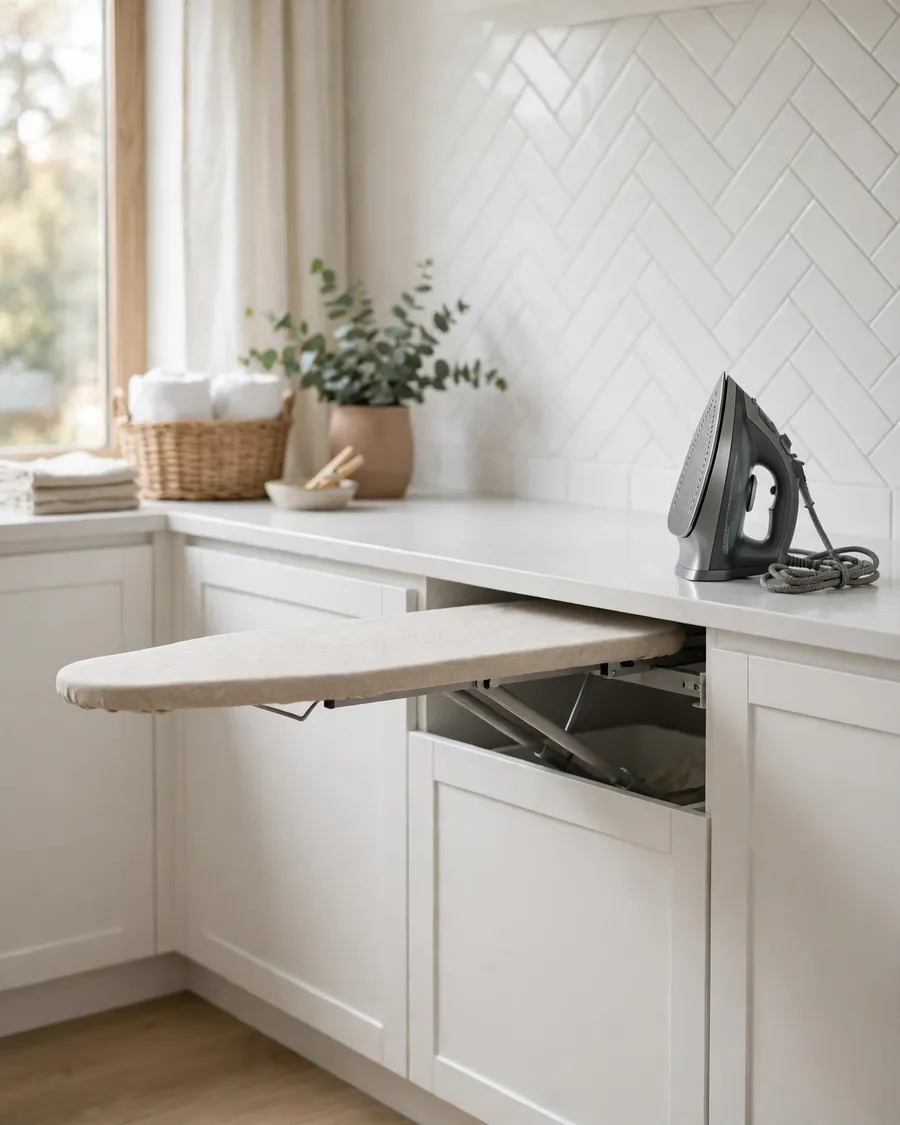
A pull-out ironing board that slides out of a drawer under the counter gives you a pressing surface only when you need it, then vanishes again. Best for: laundry rooms with a counter but no spare wall. Styling tip: store the iron in the drawer beside it so the whole station opens in one pull. Pro tip: these boards are narrower than full-size ones, so they suit shirts and sleeves — press bed linen on the counter instead.
Baskets, Bins and Small Organisers
21. Labelled Bins, One Per Family Member

Labelled bins give each family member one box for their own clean laundry, and end the daily hunt for lost socks and school shirts. Best for: shared family laundry rooms. Styling tip: keep the labels small and neat — a label maker beats handwriting here. Pro tip: bins 10 to 11 inches wide fit most standard shelves; check the width before ordering a full set.
22. Woven Baskets on Open Shelves
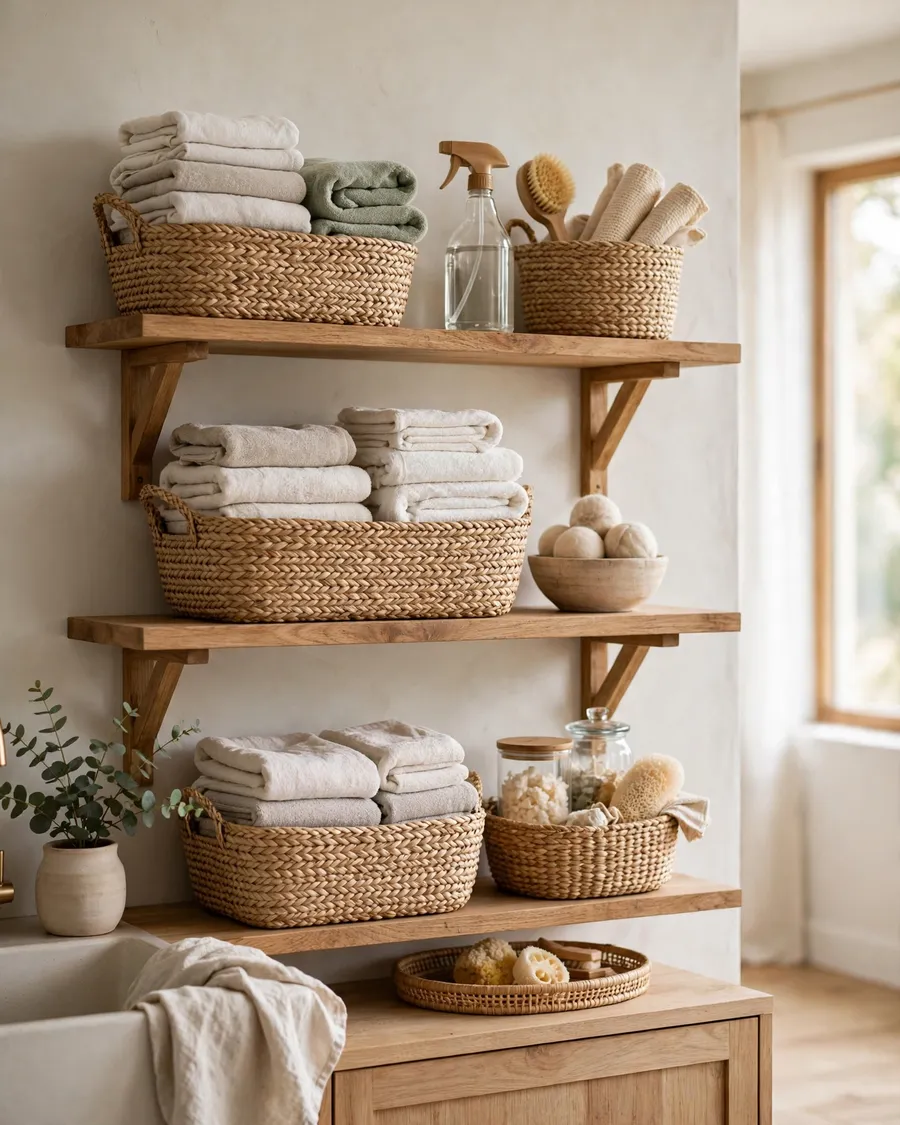
Woven baskets on open shelves are the easiest way to make a laundry room look styled rather than cluttered, because the mess hides inside matching boxes. Best for: open shelves that show everything. Styling tip: give each basket one category — towels, cleaning, spare supplies. Pro tip: seagrass and cotton rope baskets handle laundry-room humidity well, but wipe them dry after steamy wash days.
23. Clear Jars and Canisters for Detergent
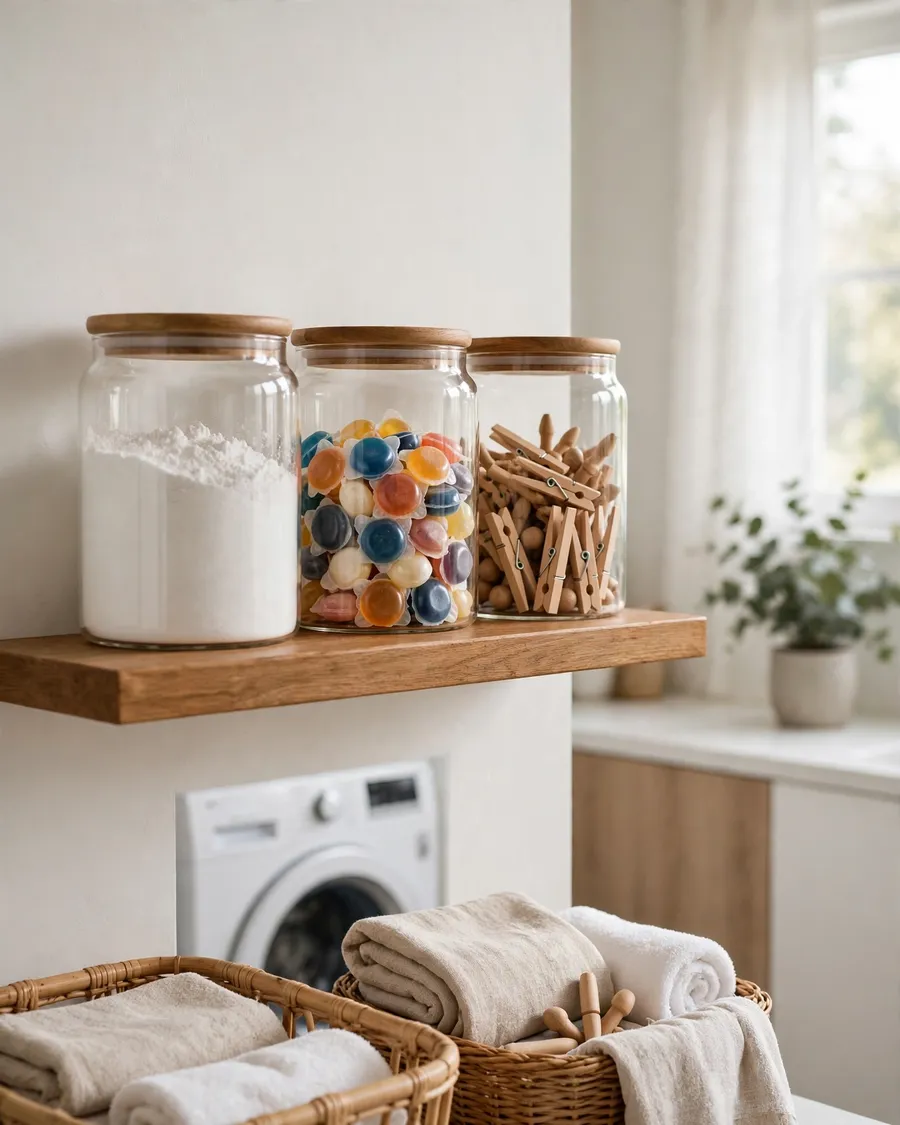
Clear glass canisters turn bulky detergent packaging into display: powder, pods and pegs look tidy behind glass, and you can see at a glance what needs restocking. Best for: open shelves and laundry rooms that double as showpieces. Styling tip: use matching canisters in two sizes and keep the branded boxes out of sight. Pro tip: airtight lids matter here — damp laundry-room air clumps powder within weeks.
24. A Wall-Mounted Dispenser Station
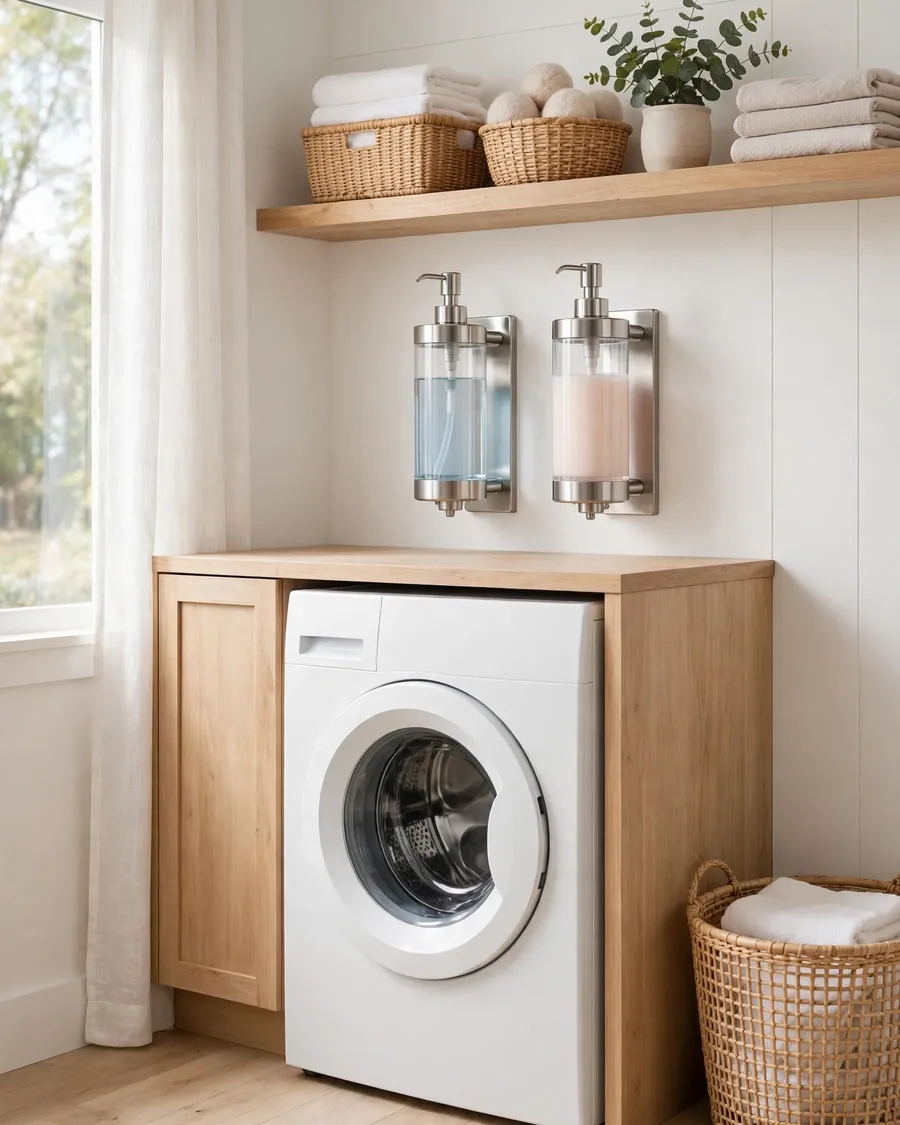
Wall-mounted pump dispensers for detergent and fabric softener free the shelf of bottles entirely and measure out the same dose every single wash. Best for: households that buy detergent in bulk. Styling tip: label each dispenser clearly — detergent and softener look identical in matching bottles. Pro tip: mount dispensers above the washer’s detergent drawer so drips land in the drawer, not on the floor.
25. An Over-Door Rack for Small Supplies
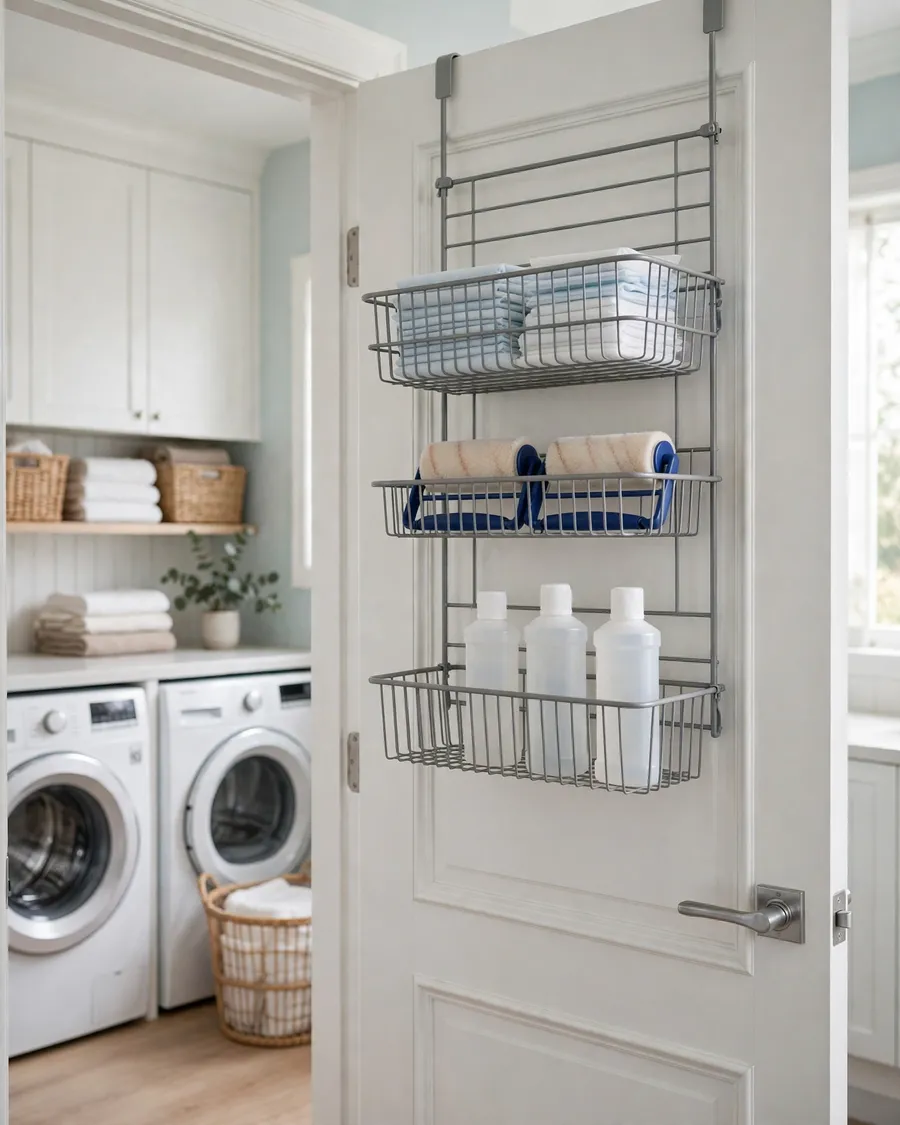
An over-door rack uses the back of the laundry room door — space that holds nothing in most homes — for dryer sheets, lint rollers and stain sticks. Best for: renters and tiny laundry rooms with no spare wall. Styling tip: keep the rack shallow so the door still opens fully against the wall. Pro tip: check the door clearance first: racks hook over the top, and thick doors or tight frames can stop the door closing.
26. A Pegboard Wall for Tools and Supplies

A pegboard wall turns one blank stretch of laundry room wall into flexible storage: hooks, small baskets and shelves that move whenever your routine changes. Best for: renters who want storage without drilling new holes every month. Styling tip: hang only what you use weekly — a pegboard full of rarely used tools reads as clutter. Pro tip: pegboard hooks come in two pin sizes, so buy hooks matched to your board or they will slip out under weight.
27. Hooks and a Rail for Bags and Hangers
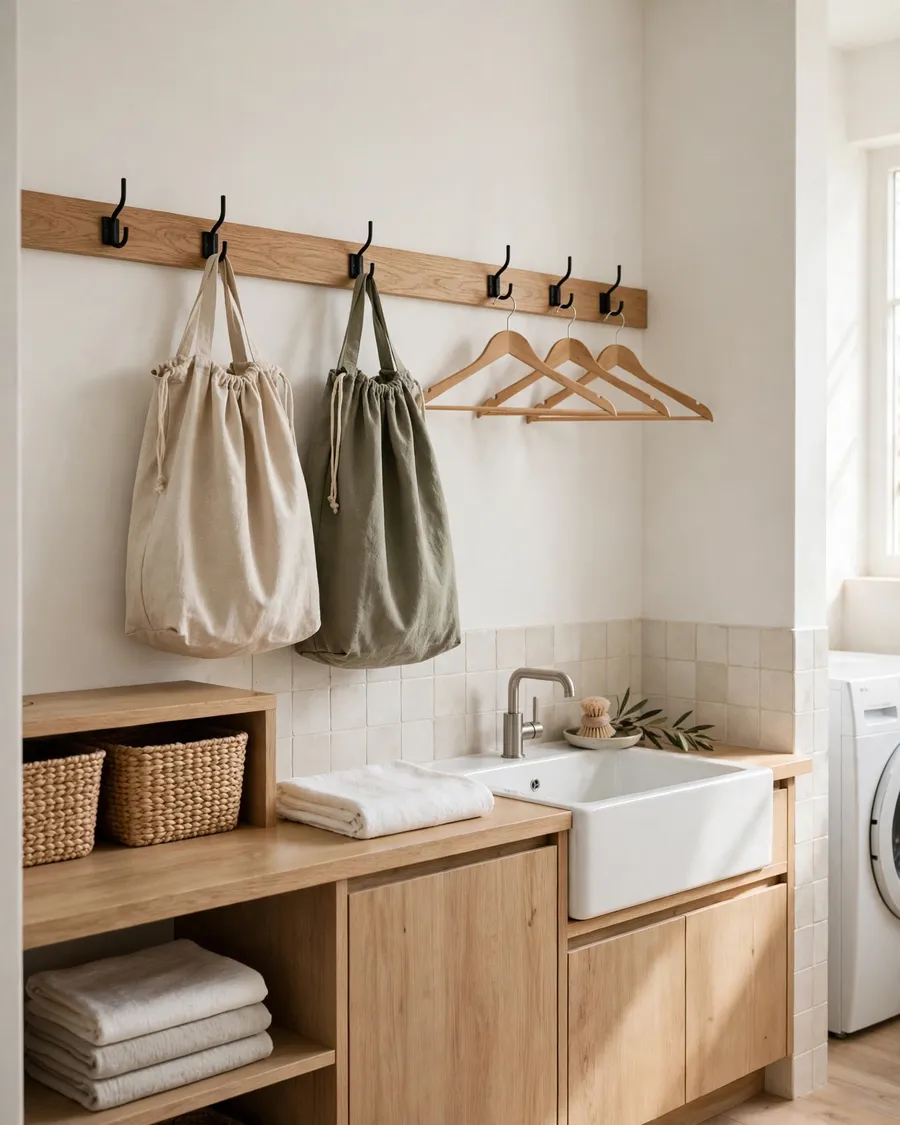
A wall rail with sturdy hooks holds reusable laundry bags, empty hangers and the ironing board cover — all the awkward items that never fit on a shelf. Best for: laundry rooms with a spare stretch of wall by the door. Styling tip: space hooks 6 inches apart so bags hang without bunching. Pro tip: screw the rail into studs, not just plasterboard — a rail full of wet laundry bags pulls hard on the wall.
28. A Lost-Sock Bin and Small-Item Station
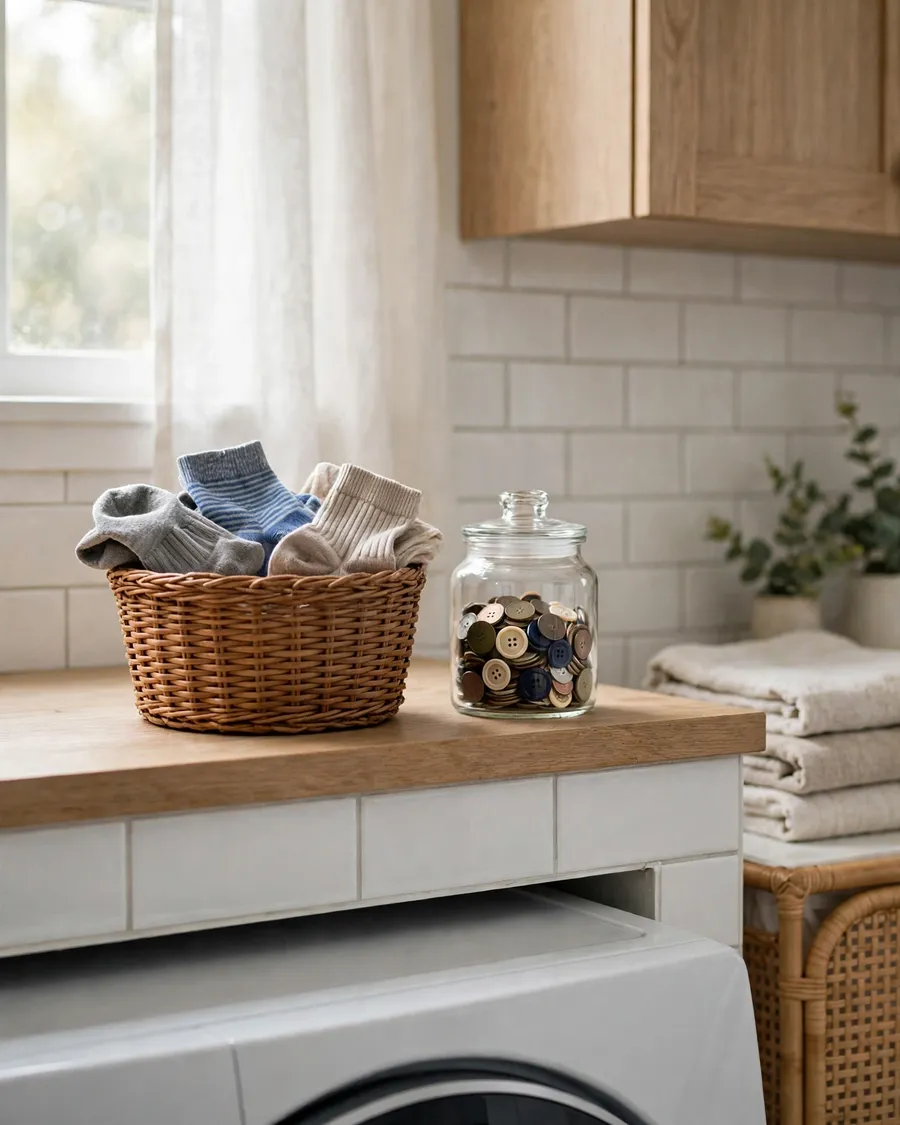
Every laundry room needs one small basket for lost socks, plus a jar for the coins, buttons and tissues found in pockets — the tiny items that otherwise scatter everywhere. Best for: every laundry room, honestly. Styling tip: keep the station on the lowest shelf so anyone can reach it. Pro tip: empty the sock basket once a month: unmatched socks older than a month go to the rag bag, not back into the drawer.
Laundry Room Storage Care and Upkeep
Laundry room storage stays tidy with small habits: wipe shelves weekly, because detergent dust sticks fast in a damp room; keep heavy bottles low, never above head height; and re-edit the shelves every season — if a basket has not been opened in a month, empty it. Check wall anchors yearly, keep the floor clear around the machines, and never store anything on top of a top-loader that blocks the lid. For more storage ideas, including slim carts and behind-the-door shelves, see Family Handyman’s small laundry room storage ideas.
Frequently Asked Questions
What is the best storage for a small laundry room?
The best storage for a small laundry room uses the walls, not the floor: one long shelf above the machines, a slim rolling cart in the gap beside them, and an over-door rack for small supplies. Together these three add real storage without taking a single square foot of floor. Add labelled baskets so every category has a home, and keep daily detergent within arm’s reach of the washer. If you own the home, upper cabinets with doors hide the rest and make the room look twice as tidy.
How high should shelves be above the washer and dryer?
Mount the lowest shelf 18 to 20 inches above the machines, which leaves room to lift a top-loader lid fully and to pull detergent bottles out without tipping them. Space shelves 14 to 16 inches apart so taller bottles fit, and keep shelves 12 inches deep — deeper shelves block the lid and shallower ones hold too little. For front-loaders the same heights work, and a countertop fitted over the machines needs about 36 inches of clearance above the floor to fold comfortably.
How do I organize a laundry room on a budget?
Start with the cheapest wins first: one long shelf over the machines, a slim rolling cart beside them, and a set of matching baskets with labels. That trio usually costs under 80 dollars and solves most of the pile-up. Add a hanging rod under the shelf for air-drying, and use an over-door rack for small supplies instead of drilling. Repurpose what you already own — a spare bookcase works as a linen cabinet, and old jars make fine detergent canisters. Spend money only after the free fixes are in place.
What should I store in upper cabinets versus open shelves?
Put daily items on open shelves and everything else behind cabinet doors. Detergent, stain remover and dryer sheets belong on the lowest open shelf, within arm’s reach of the washer, so every load starts without a search. Upper cabinets with doors hold bulk stock, bleach, cleaning chemicals and anything you want children or pets to stay away from. Keep heavy bottles low, never above head height, and reserve the highest shelf for seasonal supplies you reach for only a few times a year.
Can renters add laundry room storage without drilling?
Yes — renters have good options that need no drilling at all. A slim rolling cart slides into the gap beside the machines, an over-door rack hangs on the back of the door, and a freestanding shelving unit stands against the wall and lifts out when you move. A tension rod between two walls gives you hanging space, and a pegboard on a stand works without a single screw. Avoid anything that needs wall anchors unless your lease allows it, and always check widths against your machines before ordering.
How much does laundry room storage cost?
Most laundry room storage costs very little. One long shelf with brackets runs about 20 to 40 dollars, a slim rolling cart about 25 to 45 dollars, and a set of woven baskets 15 to 30 dollars. Upper cabinets cost 60 to 120 dollars each, while a tall pantry cabinet runs 100 to 200 dollars. A full setup — shelves, cart, baskets and a rod — usually lands between 80 and 150 dollars. The sweet spot for quality is around 100 dollars, where materials and fixings improve noticeably. Most setups take one afternoon to install.
Final Thoughts
The pile-up ends the day every item gets a home. Start with one shelf over the machines and a cart in the gap beside them, measure twice, and keep one basket per shelf. Try one idea this weekend, live with it for a week, and change only what does not work. Save this guide for your next laundry room refresh.
