
Good front walkway ideas do more than connect the street to your front door — they set the tone for everything a guest sees next. A well-made path says this home is cared for before anyone steps inside, and it works hard too: it keeps shoes dry, protects the lawn, and makes the whole front yard look finished.
The 27 ideas below cover every budget and home style, from herringbone brick and flagstone to gravel paths, curved routes, glowing lights and arbors. Pick the material that suits your house, then add one or two finishing touches — a border, some planting, a little light — and the walk does the welcoming for you.

Why You’ll Love These Front Walkway Ideas
A front walkway is the first thing guests touch and the last thing they remember, so it earns more attention than most front-yard projects. These ideas are grouped by material first, then shape, planting, lighting and finishing touches, so you can start with the surface underfoot and layer on the rest. Most cost less than a full garden overhaul, and every one lifts curb appeal the day it goes in.
How to Choose the Right Front Walkway for Your Home
Start with the route people already walk — the worn strip across the grass tells you where the path belongs. Make the main walk 4 to 5 feet wide so two people can pass comfortably, or 6 feet if you have room. Match the material to your house: brick suits traditional homes, bluestone suits modern ones, and gravel suits cottages. For the bigger picture, our backyard landscaping ideas show how the same materials can tie the front and back yards together.
Classic Materials That Never Date
1. A Herringbone Brick Path
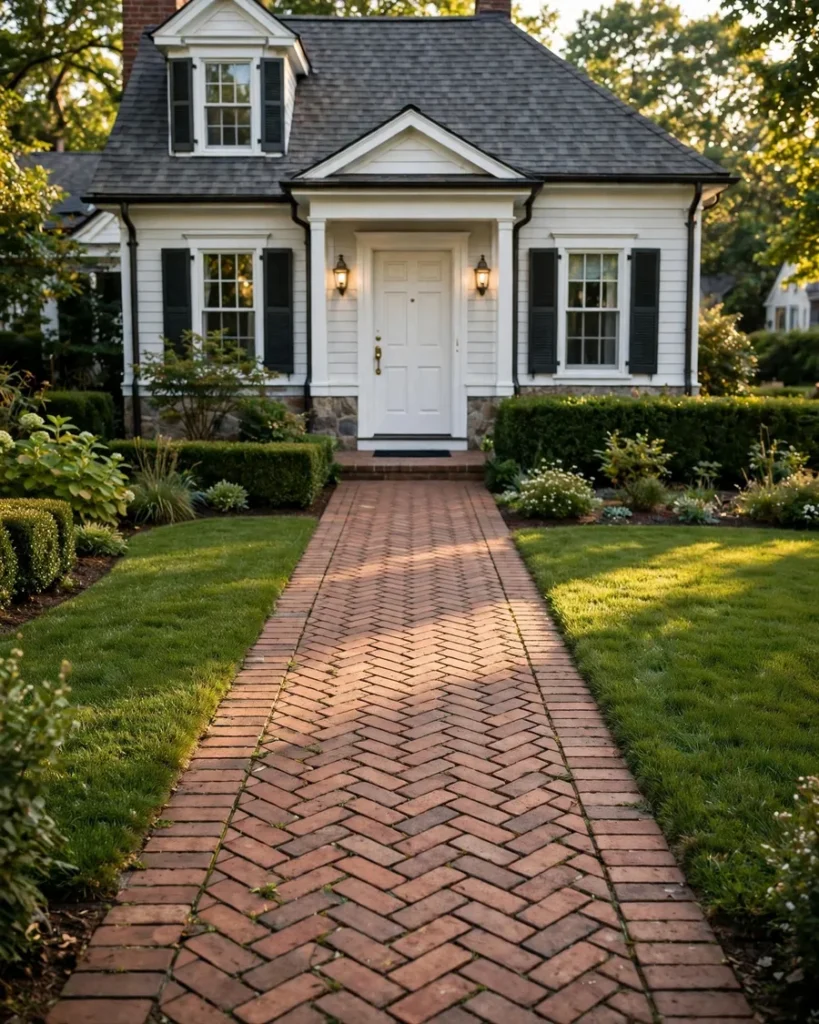
Laid in a zigzag herringbone pattern, brick turns a plain walk into a feature in its own right. The interlocking pattern locks the bricks together, so the path stays flat for years with almost no shifting. Best for: traditional, colonial and cottage homes. Styling tip: use a darker mortar joint to make the pattern pop. Pro tip: reclaimed brick costs less than new and the weathered colour variation hides dirt and stains far better.
2. An Irregular Flagstone Walkway
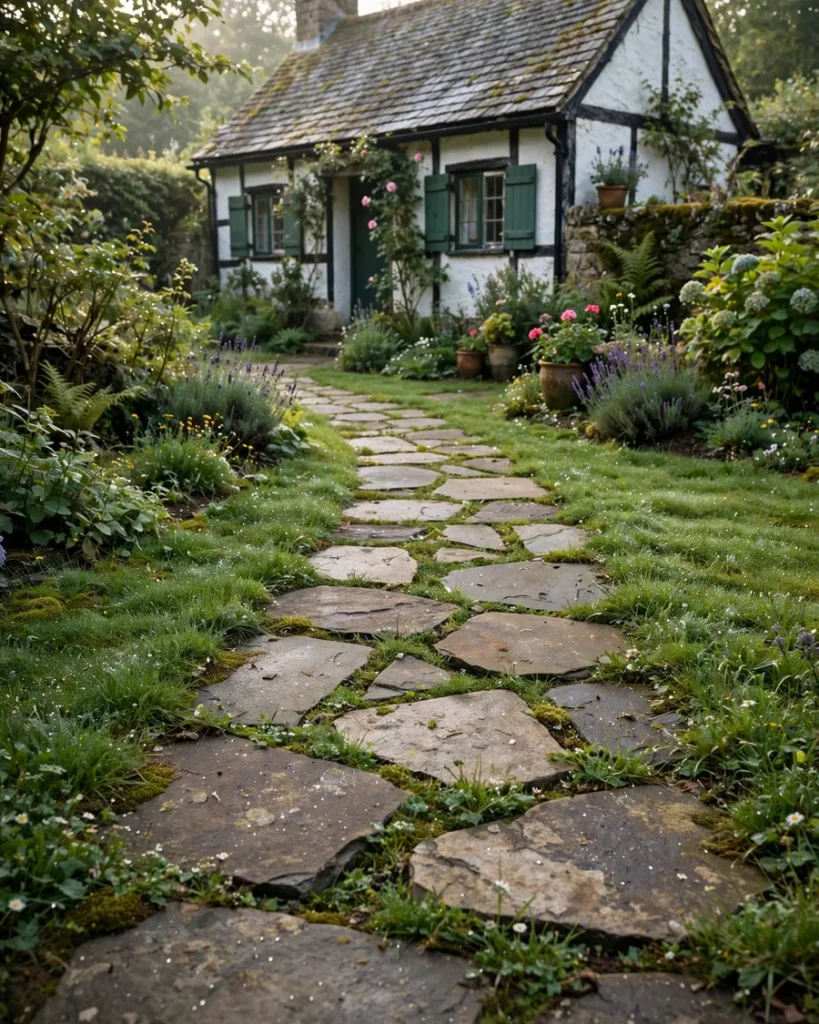
Flagstone slabs in natural, uneven shapes give a path an easy, lived-in feel that no poured surface can copy. Each stone is a slightly different shade of grey, gold or rust, so the walk looks hand-built rather than factory-made. Best for: rustic, craftsman and cottage-style homes. Styling tip: leave 2-inch gaps and plant creeping thyme between the stones. Pro tip: choose stones at least 2 inches thick — thinner pieces crack under foot traffic within a season or two.
3. A Bluestone Slab Path
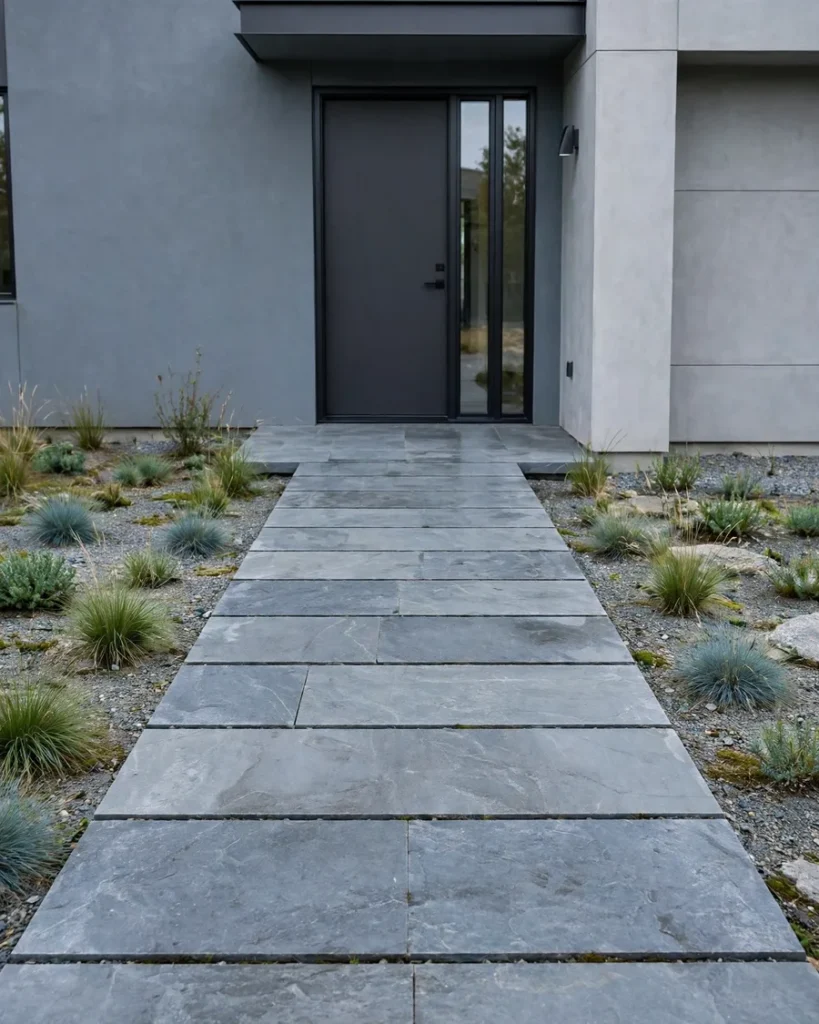
Bluestone’s cool blue-grey tones and naturally split surface make it the smartest pick for a modern front yard. Large rectangular slabs laid with narrow joints look crisp against dark house paint or pale render. Best for: modern, minimalist and mid-century homes. Styling tip: keep the joints tight and straight for a tailored look. Pro tip: seal bluestone once after laying — it darkens the colour slightly and stops the stone soaking up leaf stains in autumn.
4. Large-Format Concrete Pavers
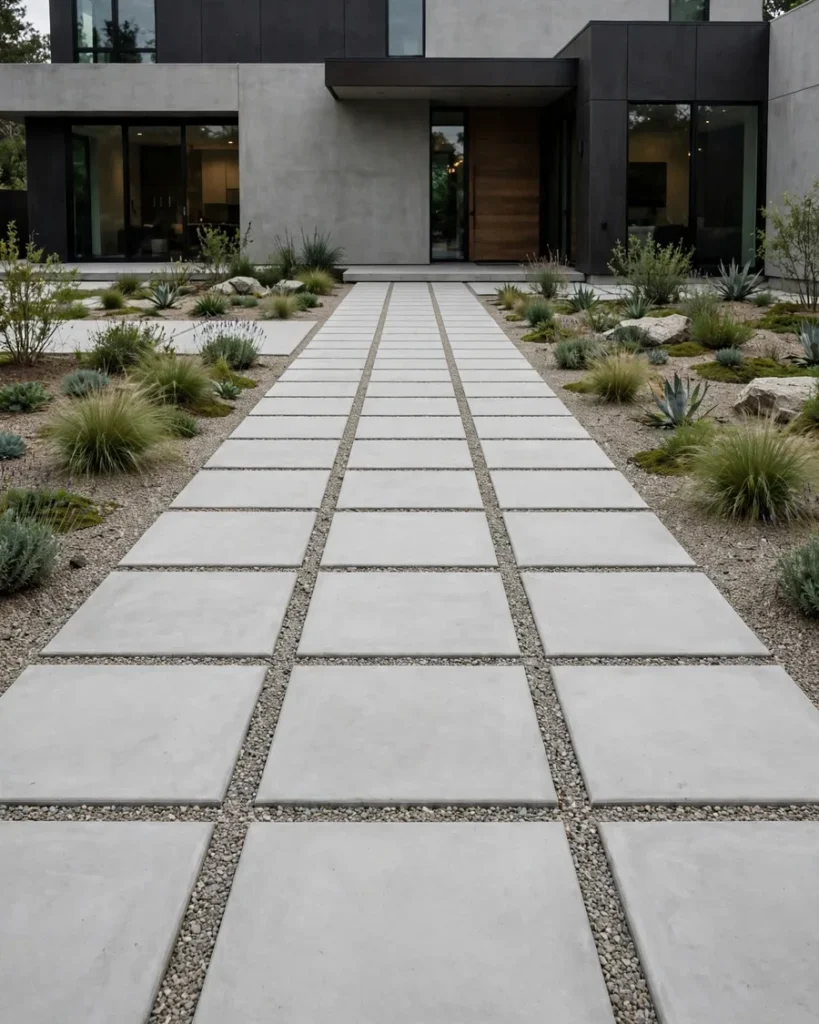
Oversized concrete pavers — 24 by 24 inches or bigger — give a front walk a calm, architectural feel without the price of natural stone. Set them in gravel or grass and the grid reads as deliberate design, not a driveway. Best for: contemporary homes and small front yards. Styling tip: stagger the pavers slightly off-grid for a softer look. Pro tip: bed pavers on a 4-inch compacted gravel base, not bare soil, or they will rock and tilt after the first wet winter.
5. A Crushed Gravel Walkway
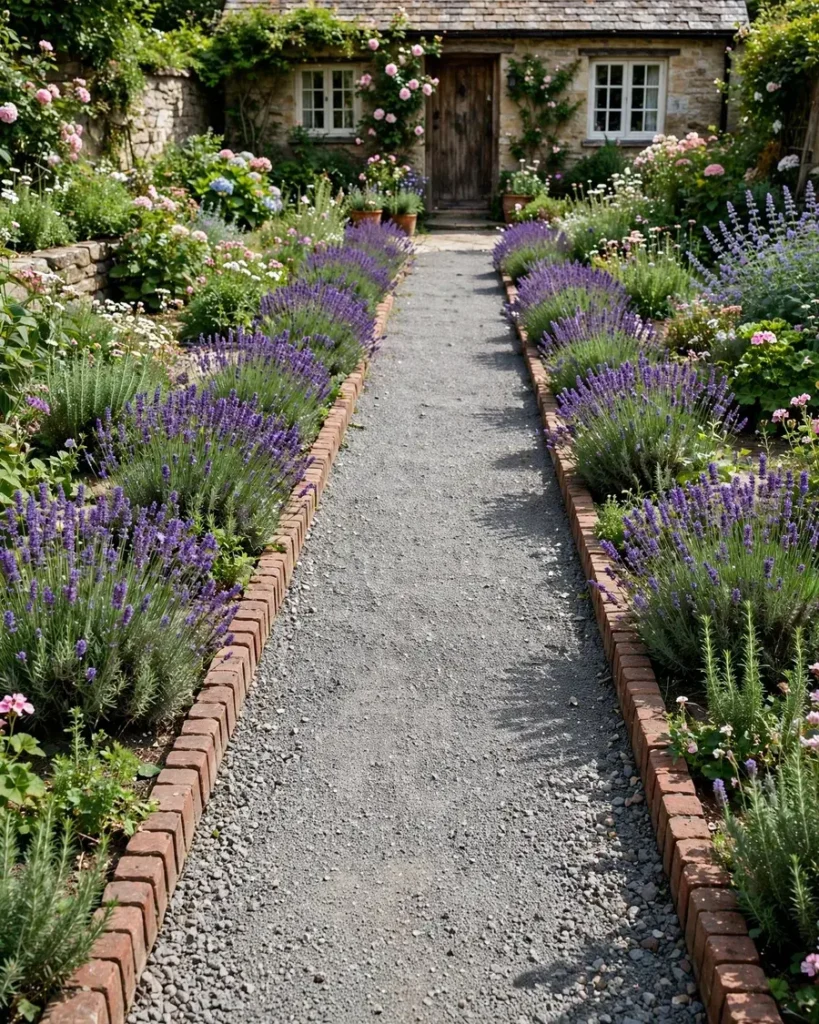
Crushed gravel is the friendliest walkway material for a weekend project: no cutting, no mortar, just a dug-out bed, landscape fabric and a few wheelbarrows of stone. The gentle crunch underfoot even adds a little security, since you can hear visitors coming. Best for: cottage gardens and tight budgets. Styling tip: pick a warm-toned gravel that echoes your house brick. Pro tip: use 3/8-inch angular gravel, not rounded pea gravel — angular stone locks together and stays put instead of rolling underfoot.
6. Oversized Stepping Stones
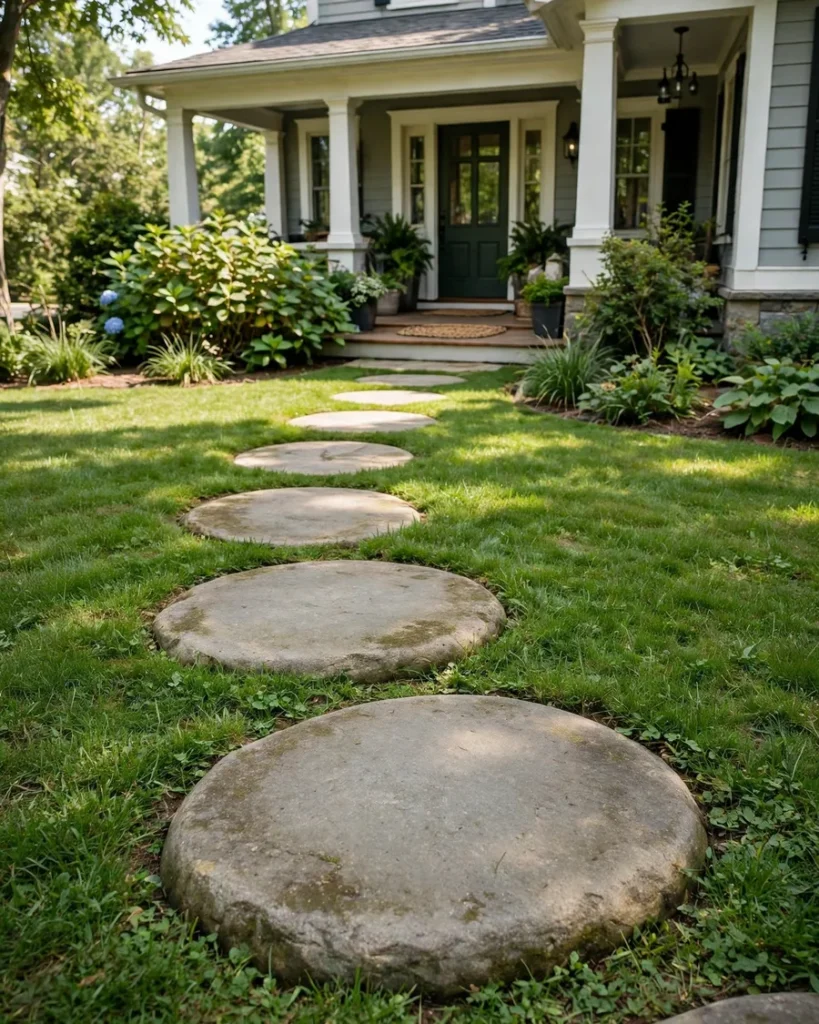
Big, flat stepping stones set into the lawn keep the yard feeling open while still giving dry feet from gate to door. Best for: small front yards and modern homes with lots of lawn. Styling tip: space stones a natural stride apart, about 18 to 20 inches centre to centre. Pro tip: set each stone on a sand bed 1 inch below the grass level so the mower passes straight over without catching an edge.
Curves, Widths and Shapes That Guide Guests In
7. A Gently Curved Path
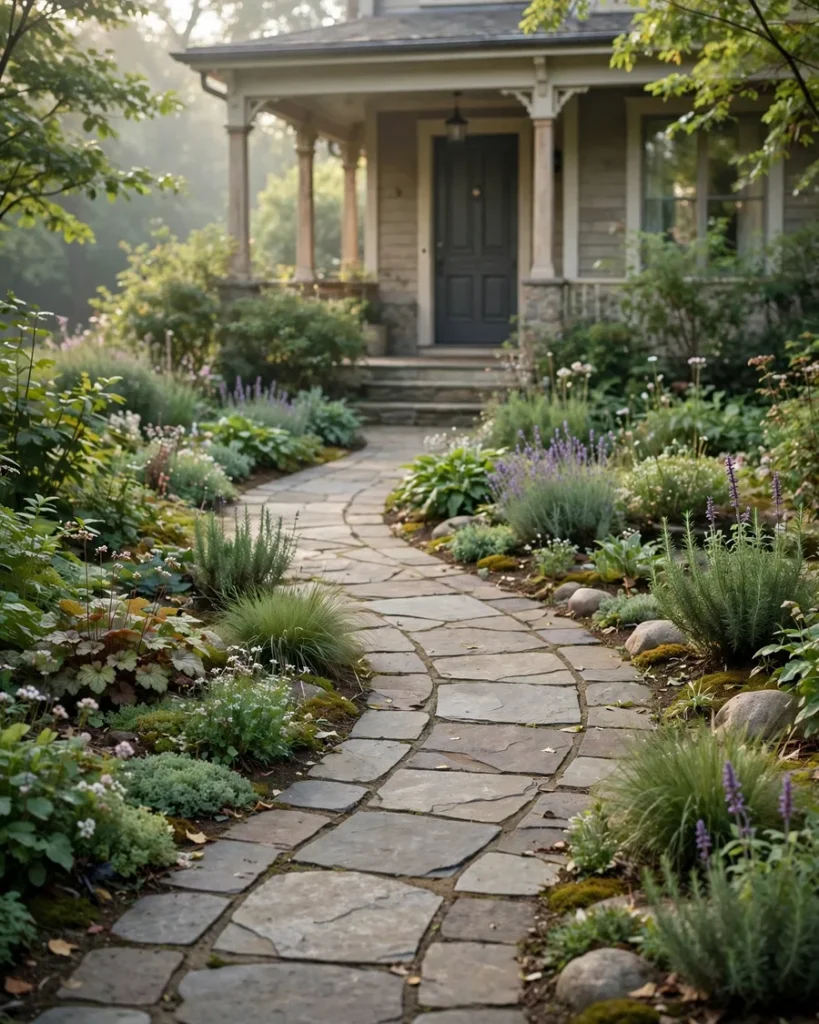
A soft curve slows the walk down and makes a front yard feel bigger, because the door is revealed gradually instead of all at once. Best for: larger front yards and homes set back from the street. Styling tip: plant a small tree or a big pot at the bend as a focal point. Pro tip: lay out the curve with a garden hose first and walk it twice — a curve that looks good on paper often feels too tight underfoot.
8. An Extra-Wide Entry Walk

Widening the walk to 6 feet or more turns it from a path into an entrance, and two people can stroll side by side without one stepping onto the lawn. Best for: grand entrances and homes with a wide facade. Styling tip: run a different border material along the edges to frame the width. Pro tip: slope the surface 1/4 inch per foot away from the house so rainwater drains off the path instead of pooling against the foundation.
9. A Forked Walkway to Two Doors
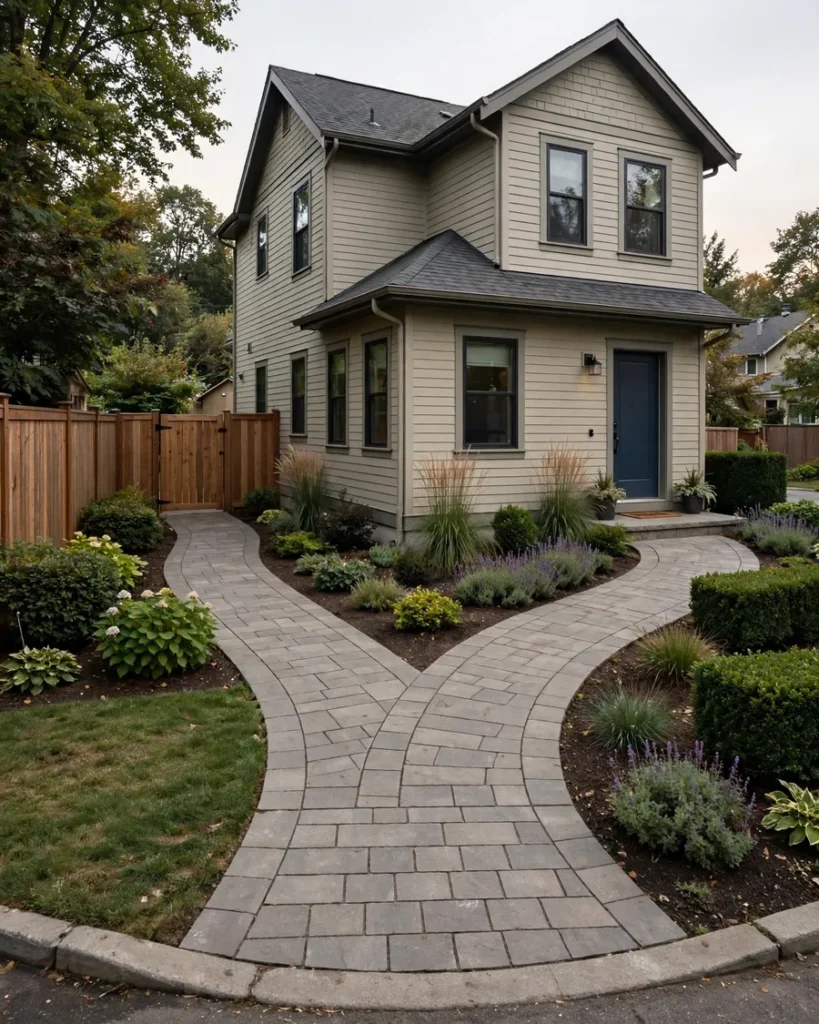
When the front door and the driveway or side gate both need a route, a forked walk solves it in one build instead of two competing paths. Best for: corner lots and homes with a side entrance. Styling tip: make the front-door branch the wider one so guests instinctively follow it. Pro tip: widen the fork junction by a foot on each side — the corner is where people turn, and a tight corner gets worn down to bare soil fast.
10. A Diagonal Shortcut Path
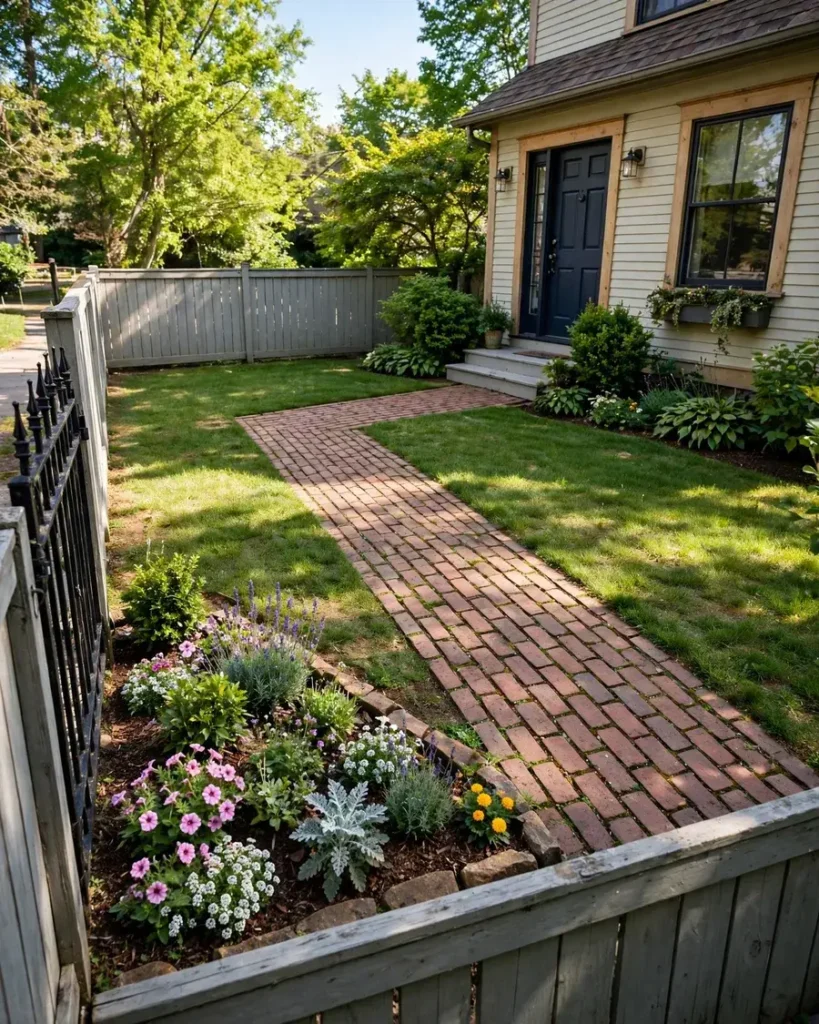
A diagonal path cuts straight from the corner gate to the door and suits homes that sit at an angle to the street. Best for: corner lots and angled house placements. Styling tip: plant a triangular bed in the corner the diagonal leaves behind. Pro tip: keep the diagonal at 45 degrees to the house where possible — odd angles look accidental and make edging and mowing awkward for years.
11. Tiered Steps for a Sloped Yard

A sloped front yard does not need a steep ramp — wide, shallow steps with landings turn the climb into a pleasant approach. Best for: hillside homes and raised front doors. Styling tip: match the step stone to the walkway material so the climb reads as one design. Pro tip: keep risers at 6 inches or less and treads at least 12 inches deep; taller risers feel like a staircase, and shallow treads are a trip hazard in the rain.
Borders, Edging and Planting Along the Path
12. Brick Soldier-Course Edging
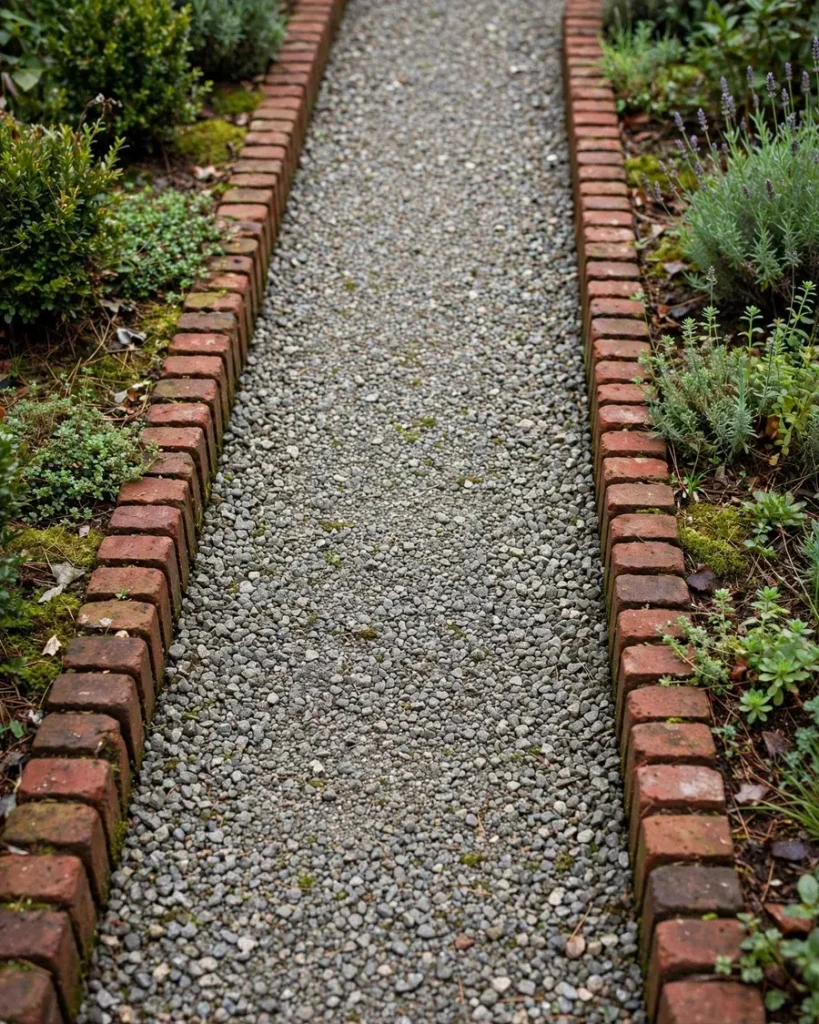
Bricks stood on end along the edge of a walk — a soldier course — give even a simple gravel path a tailored, finished outline. Best for: gravel and mulch paths that need a firm edge. Styling tip: use the same brick as the house for a pulled-together look. Pro tip: set the edging bricks in a shallow concrete haunch, not just soil — without it, the first hard frost pushes them out of line.
13. A Low Boxwood Hedge Lining
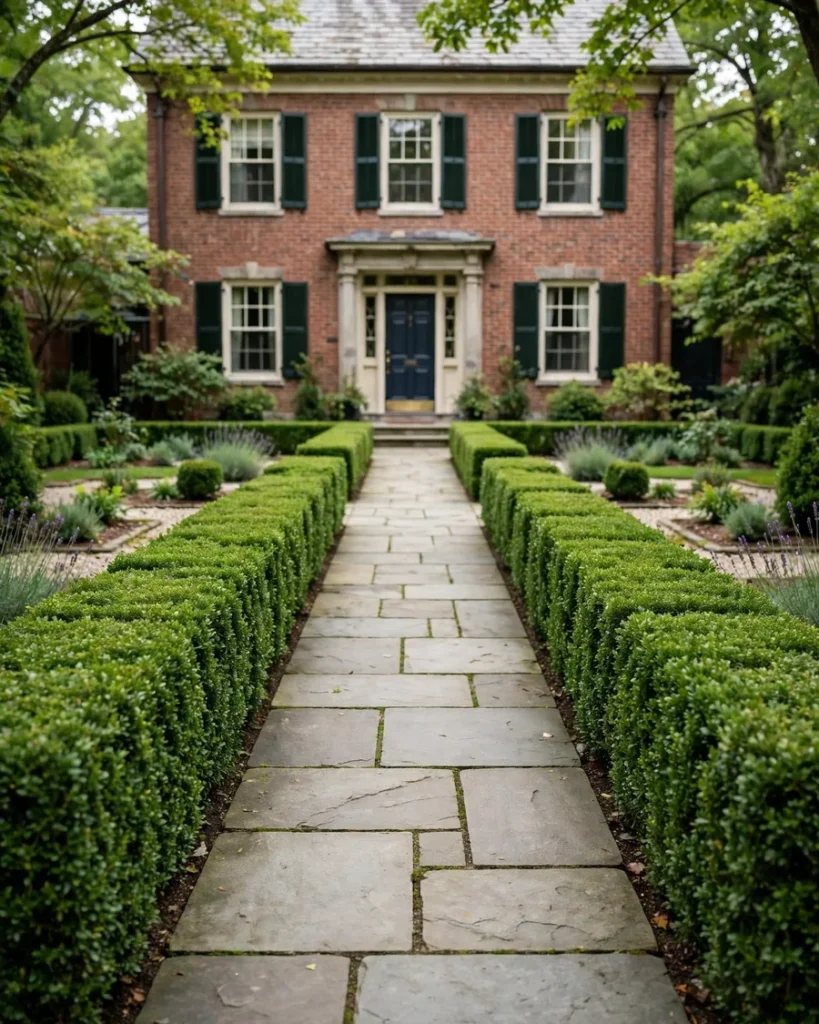
A low, clipped boxwood hedge on both sides of the walk frames the route like a green corridor and looks good in every season. Best for: formal and traditional front yards. Styling tip: clip the hedge slightly narrower at the top than the base so light reaches the lower leaves. Pro tip: plant boxwood 12 inches back from the path edge — it spreads as it grows, and a hedge that swallows the walk is a chore to keep open.
14. Lavender Lining the Path
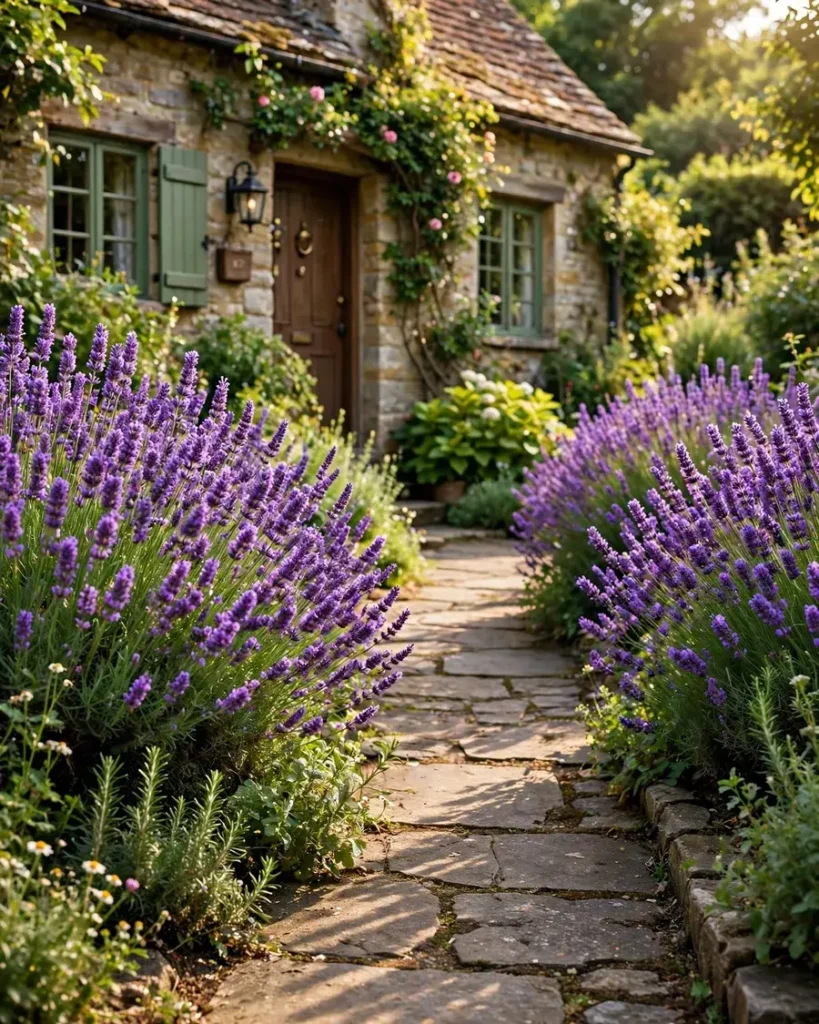
Lavender planted along the walk brushes against legs as guests pass, releasing scent with every step — a welcome no hard material can match. Best for: sunny front yards and cottage gardens. Styling tip: plant one variety in a single row for a clean ribbon of colour. Pro tip: lavender hates wet feet, so plant it on a slight mound with sharp drainage — heavy clay soil will kill it within a year.
15. Ground Cover Growing Between Stones
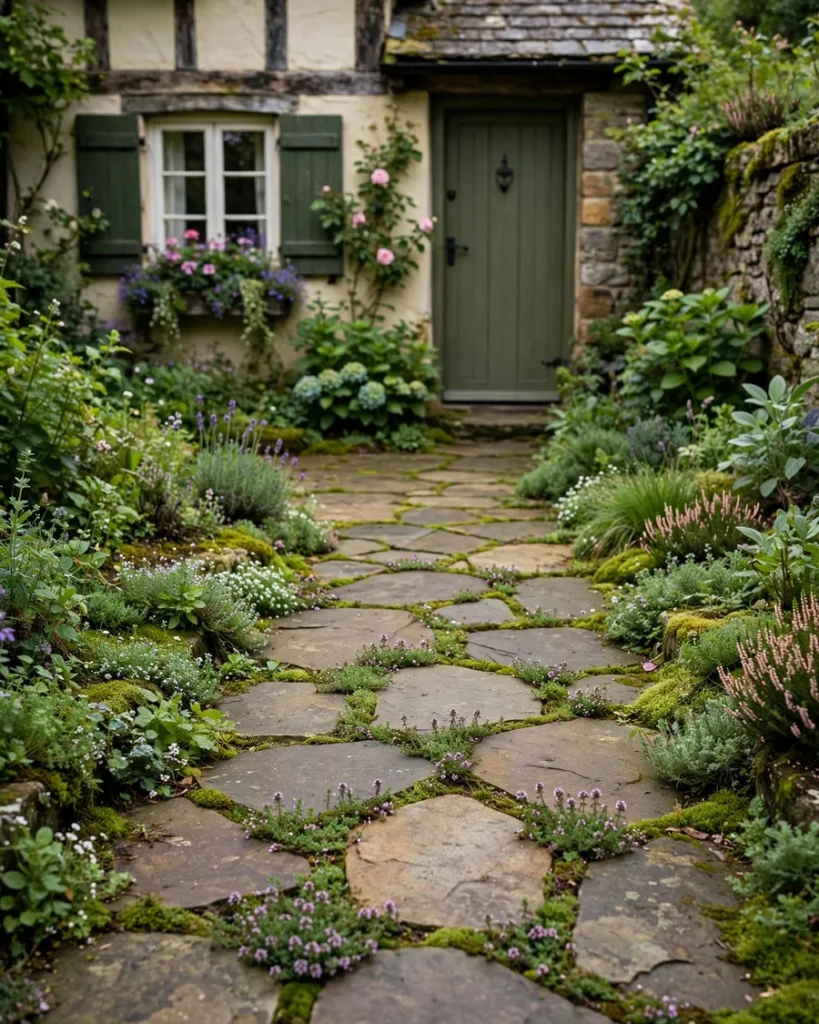
Creeping thyme, Irish moss or blue star creeper planted in the joints between stones turns the gaps into part of the design. Best for: flagstone and stepping-stone paths in part sun. Styling tip: mix two ground covers for varied texture and colour. Pro tip: creeping thyme survives light foot traffic, but keep it out of the main walking line on a heavily used path — it will wear bare where feet land every day.
16. Flower Beds Flanking the Walk
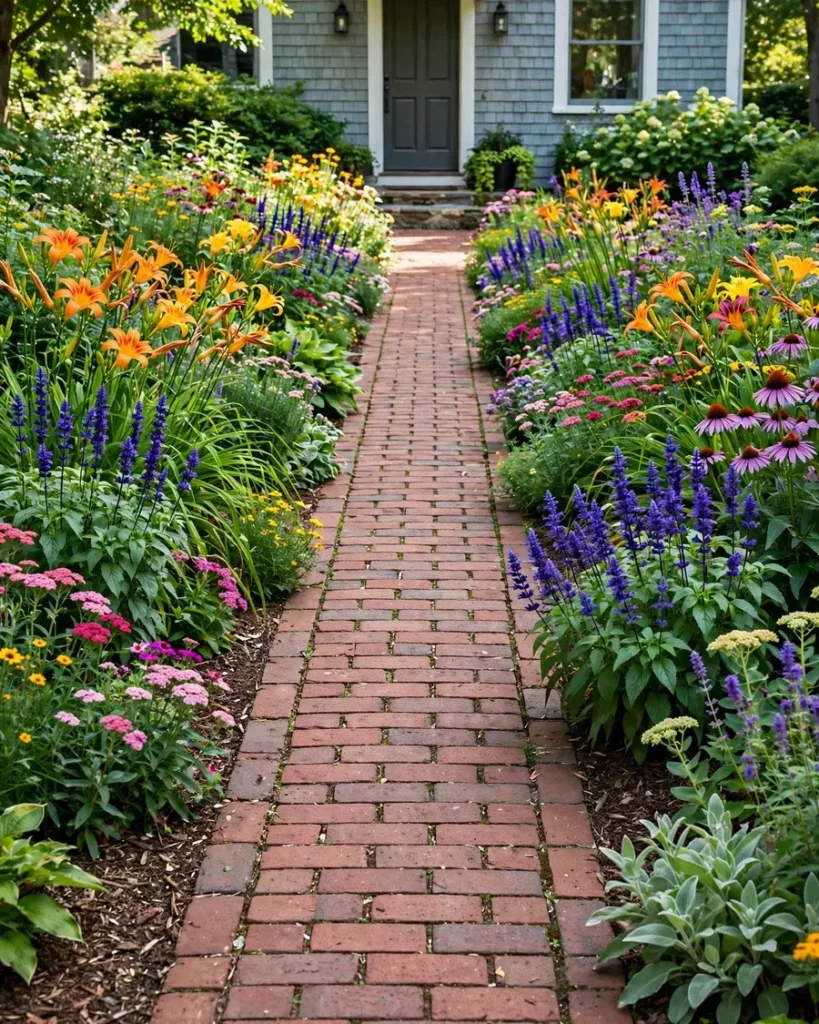
Wide beds of perennials on both sides of the walk turn a simple route into a garden walk, with colour from spring to autumn. Best for: gardeners who want colour without constant replanting. Styling tip: repeat one flower colour down both sides to tie the beds together. Pro tip: keep the tallest plants at the back of the bed and the lowest near the path, or the walk will feel like a tunnel by midsummer.
17. Ornamental Grasses Softening the Edges
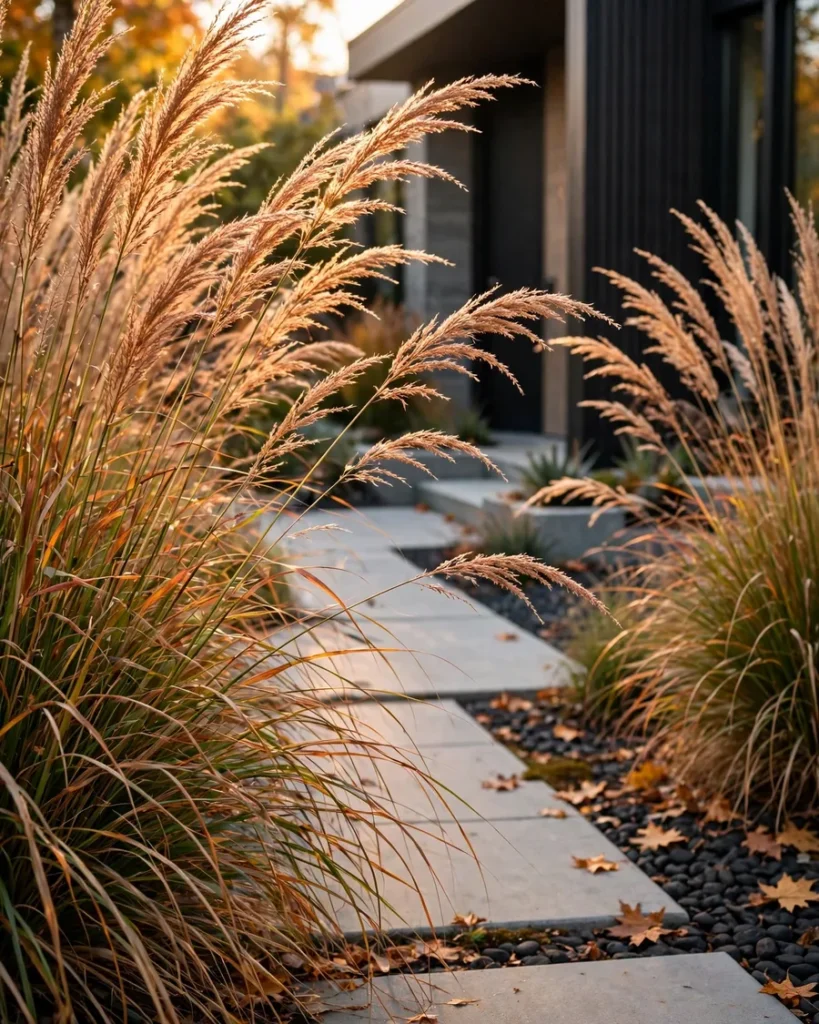
Ornamental grasses like fountain grass and blue fescue add movement and texture beside a hard path, catching light and wind in a way flowers cannot. Best for: modern and prairie-style front yards. Styling tip: plant grasses in drifts of three or five, never in a single straight line. Pro tip: cut grasses back hard in late winter before new growth starts — cutting them in autumn leaves the clump open to rot over winter.
Lighting That Guides Guests After Dark
Path lighting is the cheapest way to make a walkway feel safe and welcoming at night, and it doubles the hours your front yard looks its best. A few well-placed lights beat a dozen random ones — light the edges, the steps and the door, and leave the rest in soft shadow.
18. Low Path Lights Every Few Feet
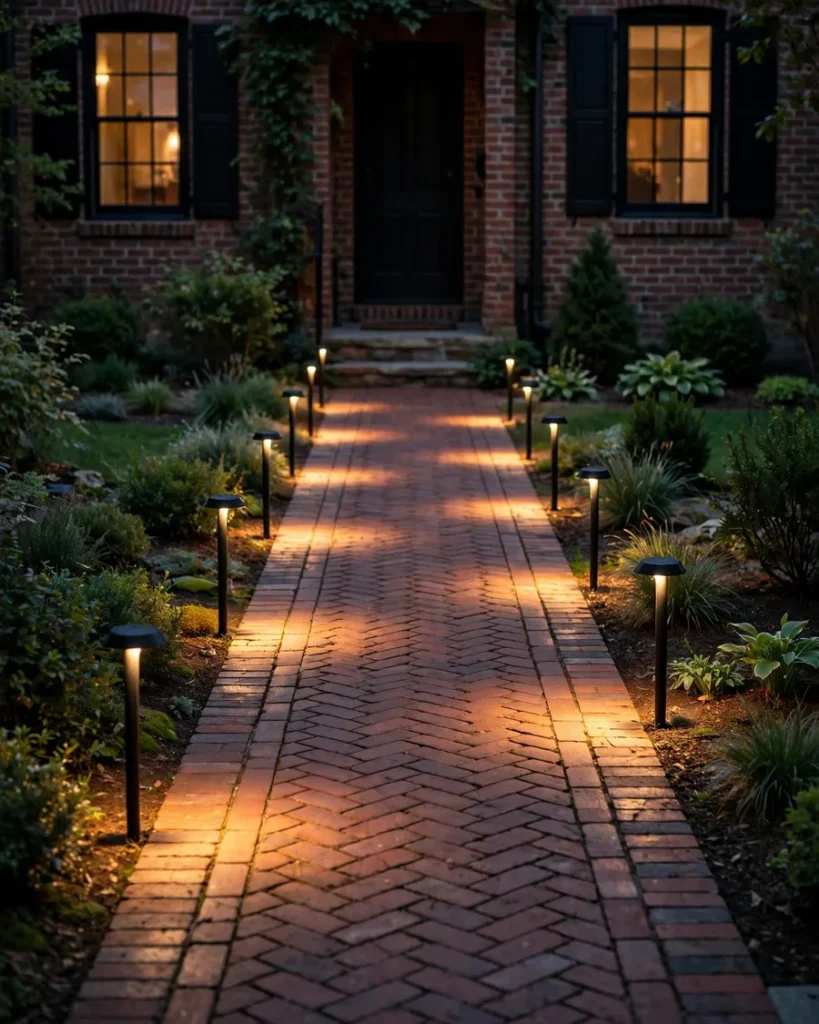
Low bollard or mushroom-style path lights wash the walk in warm pools of light. Best for: every home — this is the default lighting choice. Styling tip: stagger the lights from side to side instead of lining them up in pairs. Pro tip: space lights 6 to 8 feet apart; closer spacing looks like a runway, wider spacing leaves dark gaps.
19. Solar Lanterns Along the Edge
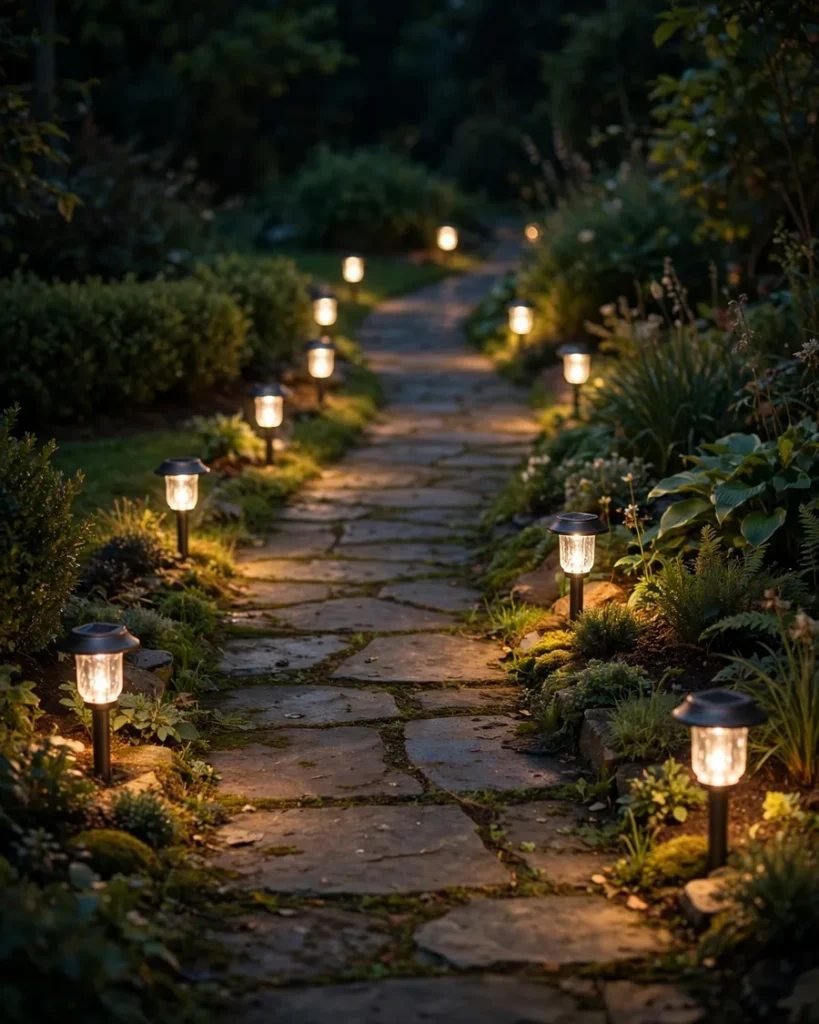
Solar lanterns need no wiring at all — push the stake into the soil and they charge by day and glow by night. Best for: renters and anyone avoiding electrical work. Styling tip: choose warm-white lanterns, not blue-white, for a welcoming glow. Pro tip: place the solar panel where it gets at least 6 hours of direct sun; a lantern shaded by a hedge will fade out before midnight.
20. Recessed Step Lights
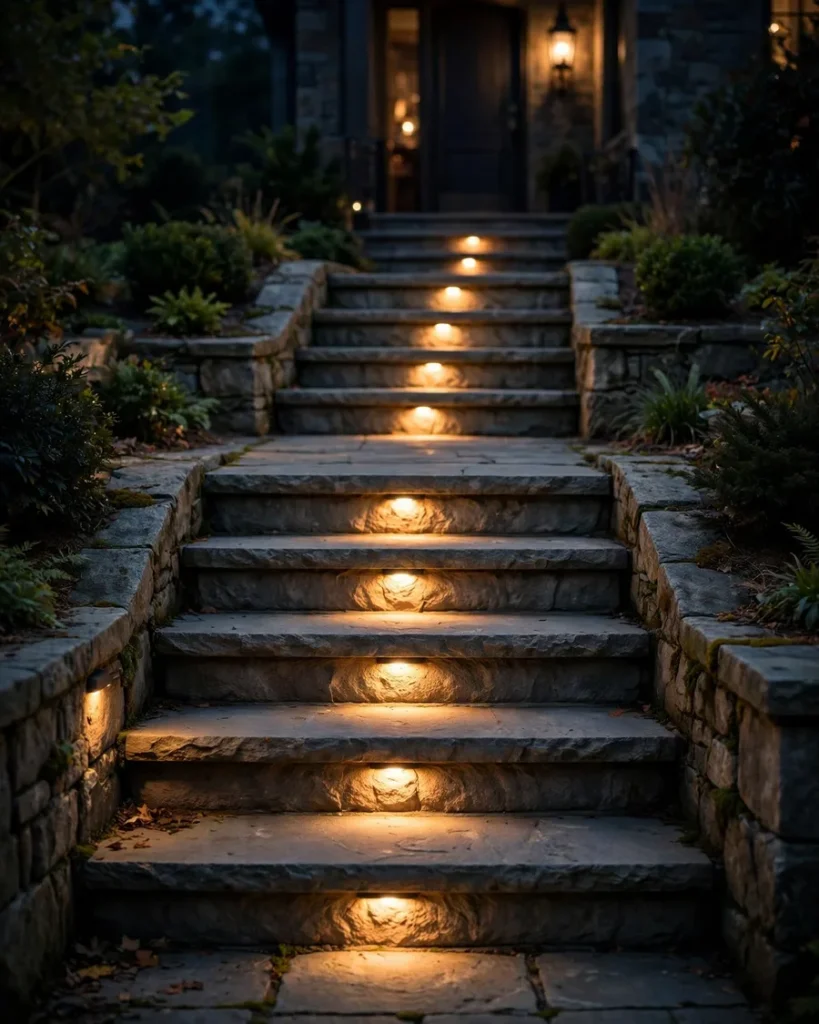
Small lights set into the risers of walkway steps or a low retaining wall light the tread without a single visible fixture in daylight. They make steps safe in the dark and look far more expensive than they are. Best for: tiered walks and raised entrances. Styling tip: use one light per step, centred on the tread. Pro tip: pick fixtures with a hooded or louvred lens so the light washes down the step instead of shining straight into a guest’s eyes.
21. Uplights on Trees Beside the Walk
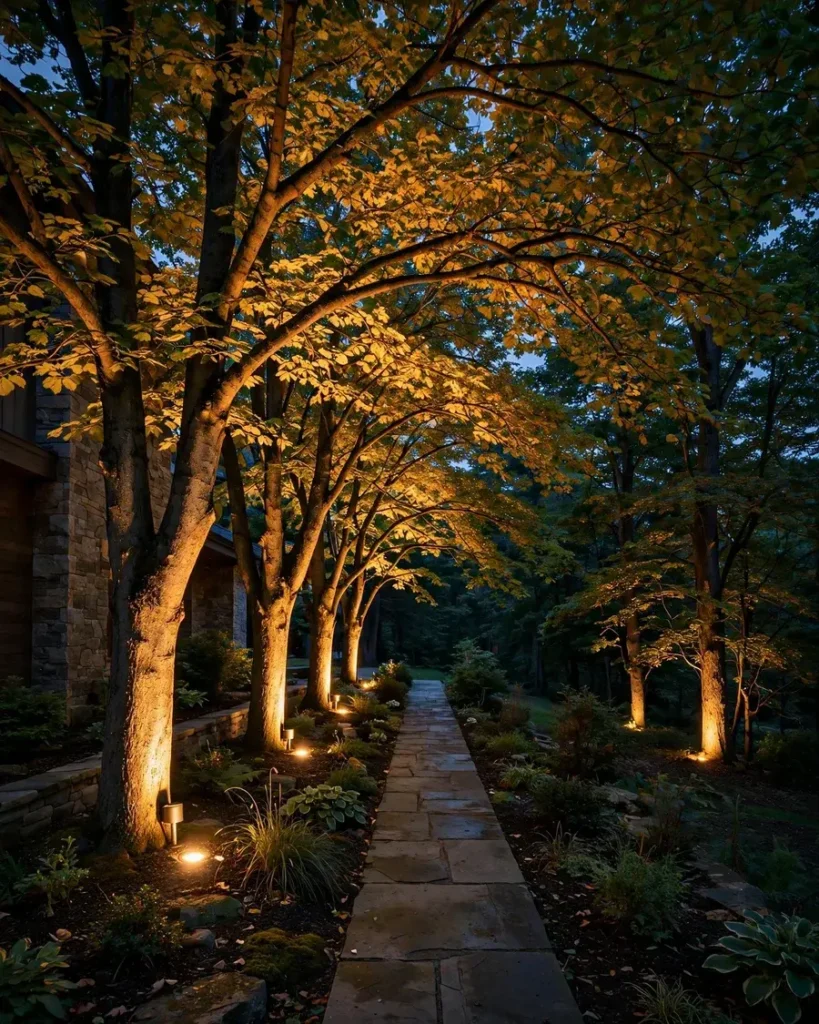
A ground-level uplight aimed at a tree canopy turns a plain walk into a glowing scene. Best for: front yards with a mature tree near the path. Styling tip: aim the light at the trunk first, then tilt it up into the canopy. Pro tip: keep uplights at least 2 feet from the trunk and use a low-wattage warm bulb — a harsh spotlight looks like a security light, not a garden feature. For more ideas, see our garden lighting ideas for paths, patios and trees.
Statement Entrances and Finishing Touches
22. A Rose-Covered Arbor Over the Path

An arbor draped in climbing roses turns the walkway into a doorway of its own — guests pass under flowers before they reach the front door. Best for: cottage and traditional front yards. Styling tip: choose a repeat-flowering rose so the arbor is not bare after June. Pro tip: build the arbor at least 7 feet tall and 4 feet wide — anything lower and guests will duck, and roses need room to grow over the top.
23. A Pergola Framing the Walkway
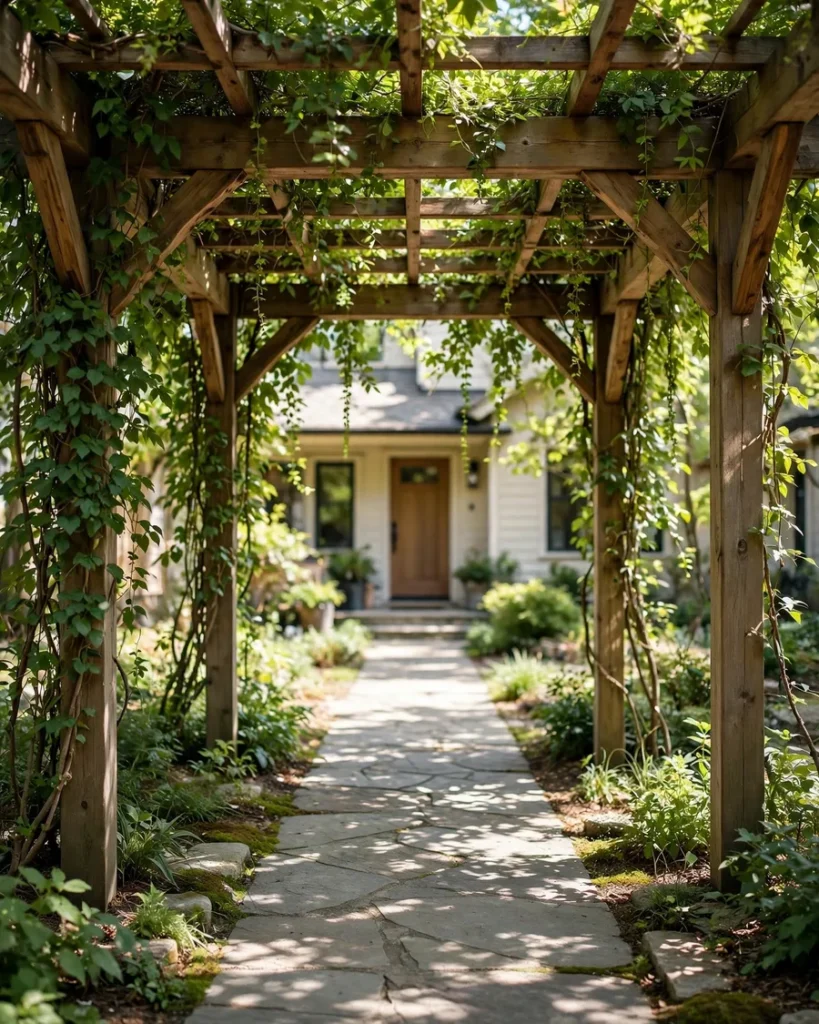
A pergola over the first stretch of the walk gives the entrance height and shade, and climbing vines turn the beams into a living ceiling. Best for: larger front yards and homes with a long approach. Styling tip: paint the pergola the same colour as the front door for a deliberate match. Pro tip: sink the posts at least 2 feet deep in concrete — a pergola is a sail in high wind, and shallow posts lean within a year.
24. A Matching Porch Landing
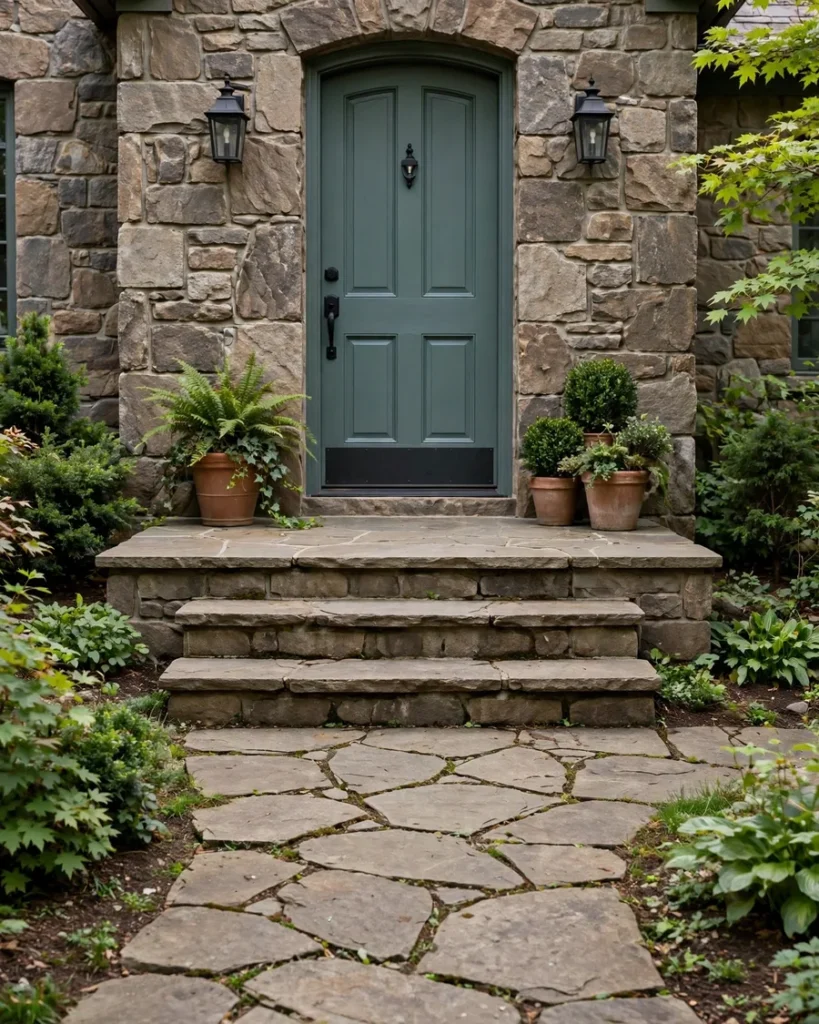
Carrying the walkway material right onto the porch landing — same stone, same brick, same pavers — makes the path and the house read as one continuous design. Best for: homes where the walk meets the porch directly. Styling tip: run the landing one step wider than the door frame on each side. Pro tip: keep the landing 1 inch below the door threshold so rain runs away from the house instead of under the door.
25. A Statement Gate at the Street

A gate at the street end of the walk tells guests exactly where to enter and gives the whole front yard a finished boundary. Best for: homes with a front fence or hedge. Styling tip: match the gate metal to the front door hardware. Pro tip: hang the gate so it swings inward onto the walk, not outward over the pavement — an outward-swinging gate blocks the pavement and can break local rules.
26. Planters and a Doormat at the Door
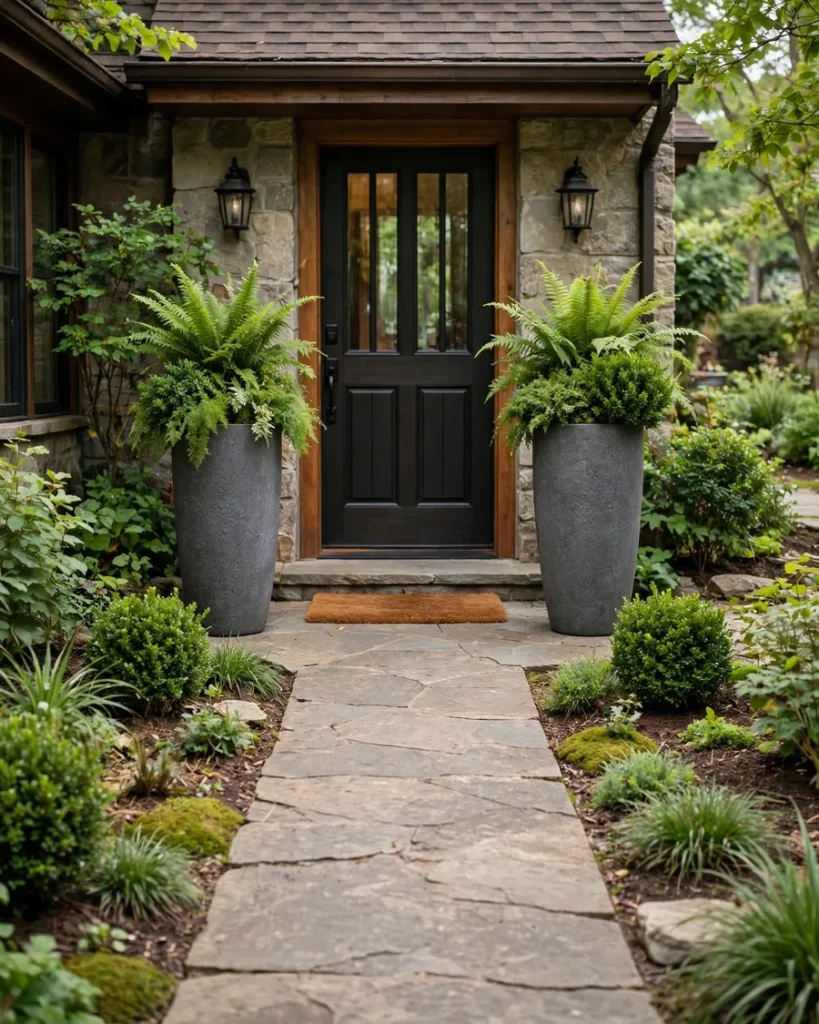
The last few feet of the walk deserve a finish: two matching planters flanking the door and a proper coir doormat between them. Best for: every home, especially rentals. Styling tip: use planters as tall as one-third of the door height for real presence. Pro tip: choose a doormat as wide as the door itself — a small mat looks lost and guests step around it, tracking dirt straight inside.
27. Seasonal Styling That Changes With the Year
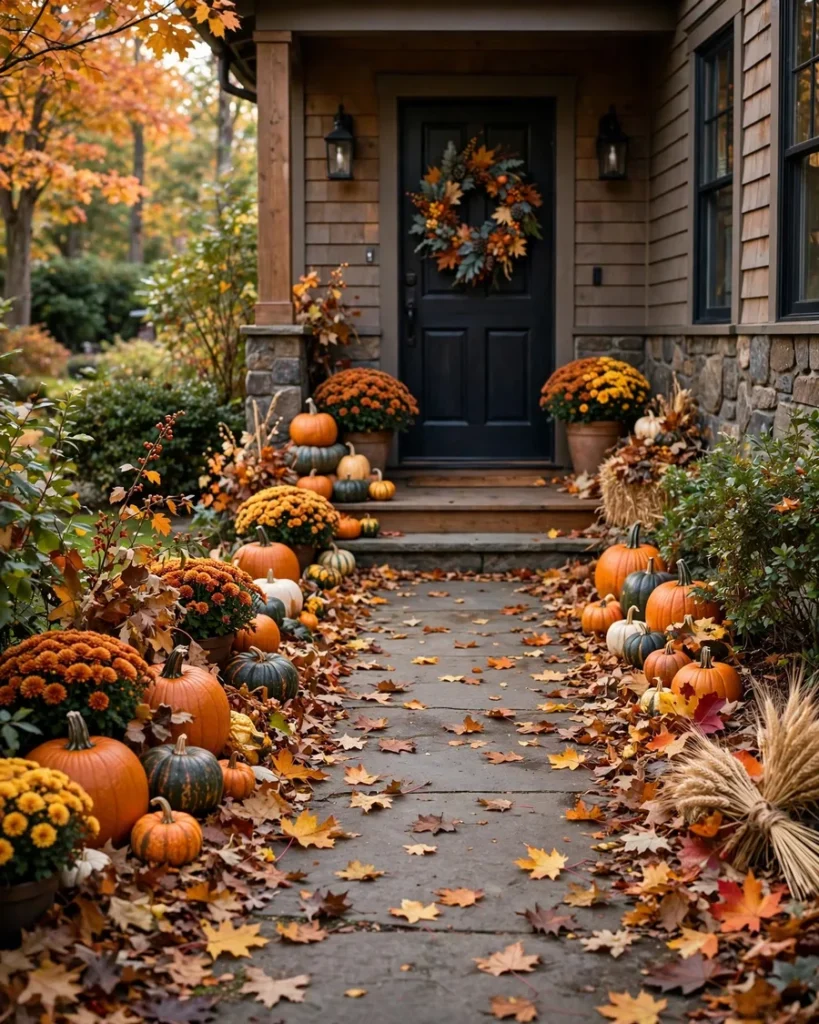
A walkway that changes with the seasons never feels stale: pumpkins and lanterns in autumn, evergreen pots and a wreath in winter, tulips in spring. Best for: homeowners who love decorating for the seasons. Styling tip: keep seasonal items to the edges so the walking line stays clear. Pro tip: store one labelled box per season with the walkway dressing inside it, so the swap takes an hour instead of a weekend.
Front Walkway Care and Upkeep
Walkway upkeep is mostly small, regular jobs. Sweep loose paths weekly so grit does not grind the surface, and pressure-wash stone and pavers once a year — spring is the best time, before the growing season. Re-sand paver joints every year or two, since rain washes the sand out. Reseal brick and bluestone every two to three years to keep stains out, and re-point any loose mortar before winter, because frost widens cracks quickly. For material-by-material guidance, the Homes & Gardens front yard walkway ideas guide covers brick, flagstone, gravel and lighting in more depth.
Frequently Asked Questions
How wide should a front walkway be?
A front walkway should be 4 to 5 feet wide at minimum, so two people can walk side by side without stepping onto the lawn. If you have the space, 6 feet feels generous and suits a wide house frontage. Narrower paths of 3 feet work for side gates or a rarely used door, but they feel cramped when guests arrive together. Whatever width you choose, keep it consistent along the whole route — a path that narrows halfway looks like a mistake and trips people up.
What is the best material for a front walkway?
The best material depends on your home and budget. Brick suits traditional houses and lasts for decades, bluestone suits modern homes and looks crisp, and large concrete pavers give a similar look for less money. Flagstone feels natural and relaxed, while gravel is the cheapest option and a genuine weekend project. Match the material to your house style first, then check the upkeep: gravel needs topping up, stone needs occasional resealing, and brick needs re-pointing every few years.
How much does a front walkway cost?
A front walkway typically costs anywhere from a few hundred dollars for a DIY gravel path to several thousand for professionally laid brick or bluestone. Gravel and stepping stones are the cheapest options, usually a few hundred dollars in materials. Concrete pavers sit in the middle, while natural stone and herringbone brick cost the most because of the labour involved. Get two or three local quotes before deciding, since prices vary widely by region and by how much digging and base work your yard needs.
Can I build a front walkway myself?
Yes, gravel paths and stepping-stone walks are genuine DIY jobs that most homeowners can finish in a weekend. You dig out the bed, lay landscape fabric, add a compacted gravel base and set the stones or gravel on top. Brick, flagstone and concrete pavers are harder — they need accurate levelling, cutting and jointing, and a poorly laid paver path will rock and sink within a year. If your walk needs steps, drainage work or a retaining wall, hire a professional rather than risking a trip hazard.
How do I keep weeds out of my walkway?
Weeds grow in walkway joints where dirt and seeds collect, so the fix is to leave them nowhere to root. Lay landscape fabric under gravel paths, sweep sand into paver joints and top it up every year or two, and use a polymeric sand that hardens when wet. Pull the first weeds by hand while they are small, because a weed left to seed will scatter across the whole path. Avoid planting ground cover in the main walking line — it wears bare and leaves gaps for weeds to move into.
Do I need a permit for a front walkway?
Most simple front walkways do not need a permit, especially if you are replacing an existing path in the same place. You may need approval if the walk changes drainage, crosses a public pavement, adds steps or a retaining wall, or sits in a historic district with design rules. Check with your local council or planning office before digging, and call your utility locator service first so you do not cut a buried cable or pipe. A quick phone call beats a fine and a torn-up path.
Final Thoughts
A front walkway earns its keep every single day, quietly guiding guests in and making the whole house look cared for. Start with the material that suits your home, get the width and the drainage right, then add one border and one light — that is enough to change the first impression completely. Save this guide, pick one idea to try this season, and let the walk do the welcoming for you.
